Setup Guides
-
Android Setup Guide
In this tutorial, we show you how to set up TunnelBear for your Android device on 8.1+ or newer. TunnelBear is compatible with most Android phones and tablets.
Download the TunnelBear app
First, you have to download the TunnelBear app from the Google Play Store.
Open the Play Store by tapping the Play Store icon on your Android device.
Search for TunnelBear.
To download the TunnelBear app, tap the Install button in the top right.
To open the TunnelBear app when it’s finished downloading, tap the Open button.
Create a TunnelBear Account
Tap Create a free account if you haven’t already signed up for TunnelBear.
Enter your email address and create a strong password then skip to Verify Your Email.
Log In with an Existing Account
If you have already signed up, tap Log in next to Already have an account.
Enter the account email and password you used at signup.
Verify Your Email
After creating your account, check your email for a verification from TunnelBear and tap “Verify my account”. If you already have a verified account, you can skip to Get Connected.
Get Connected
To connect to the fastest tunnel, select Fastest.
To access the countries list, tap the up arrow in the bottom of the screen.
Select the country you would like to tunnel through.
Permissions will be required by your device. Click Continue to proceed.
You need to select OK when TunnelBear asks for permission to add VPN configurations.
Note: TunnelBear doesn't actually monitor your network traffic. This message is a standard warning from Android letting you know VPNs might monitor your network traffic, but TunnelBear will NEVER do this. For more information about why you can trust TunnelBear, visit this help article.
You’re all set and ready to tunnel.
Your Bear is excited to help keep your internet connection secure, but if you have any questions about TunnelBear, our friendly Support Bears are always available.
Happy tunneling!
Visit/Rate Article -
Windows Setup Guide
In this guide, we’ll show you how to set up TunnelBear for your Windows computer.
Download the TunnelBear app
First, you'll have to download the TunnelBear app from our website.
Go to tunnelbear.com/download and wait until the download finishes.
Open your Downloads folder, double click on the TunnelBear-Installer file.

When prompted “Where do you want your Bear?”, click on the Install button.

Wait until the installation is complete.

Create a TunnelBear account
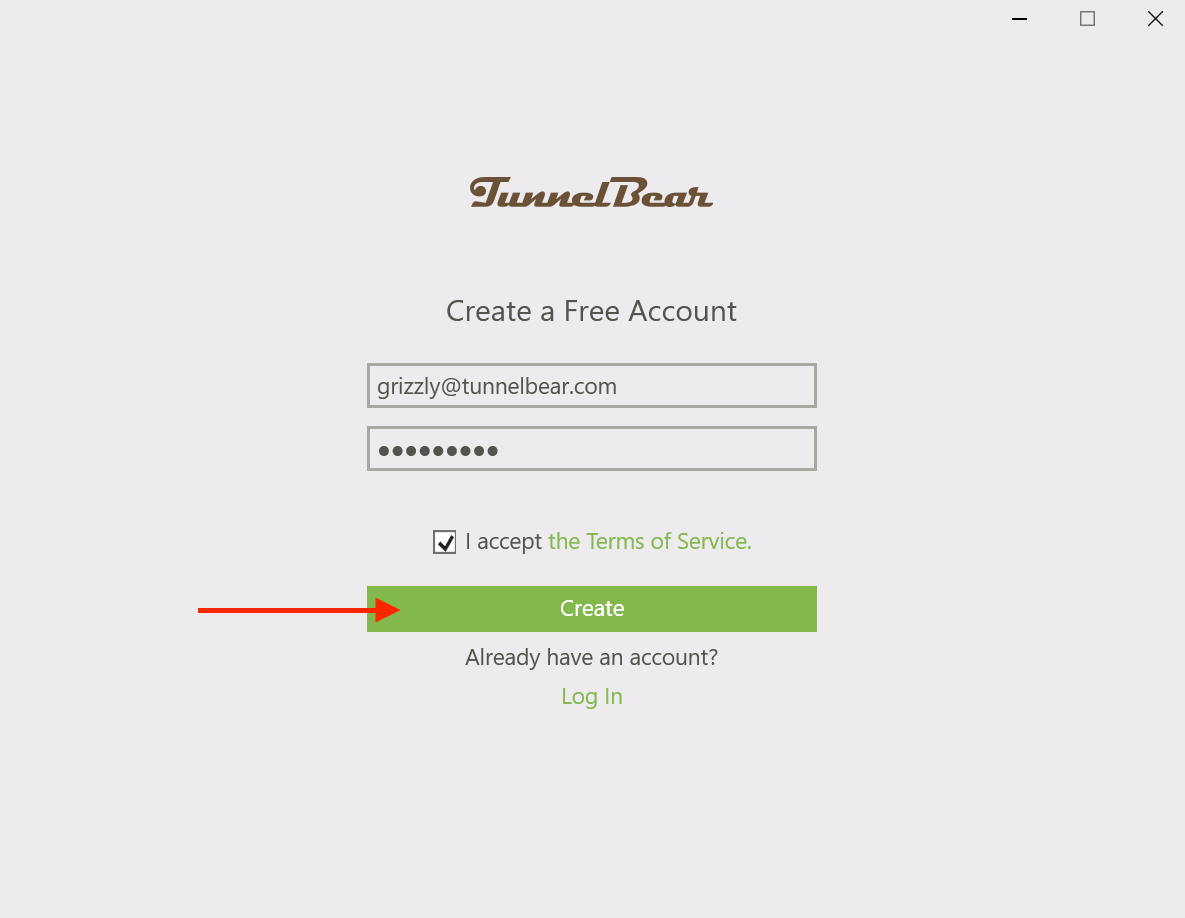
Click “Create a Free Account” if you haven’t already signed up for TunnelBear.

Enter your email address and create a strong password then skip to Verify Your Email.
Log In with an Existing Account
Click “Log in" under "Already have an account?" if you've already signed up.

Enter the account email and password you used at signup.

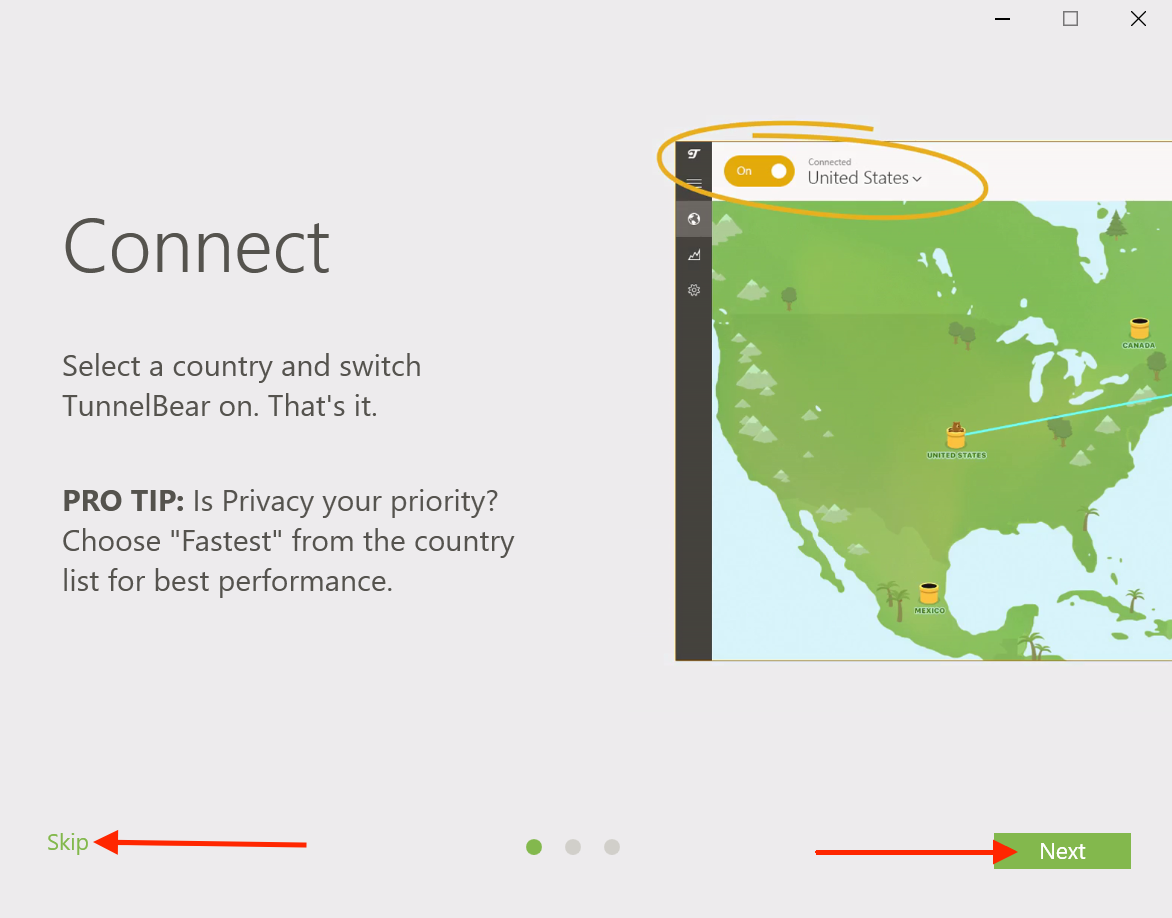
Read the Quick Guide by clicking on the “Next” button or click on “Skip” to continue.
Verify Your Email
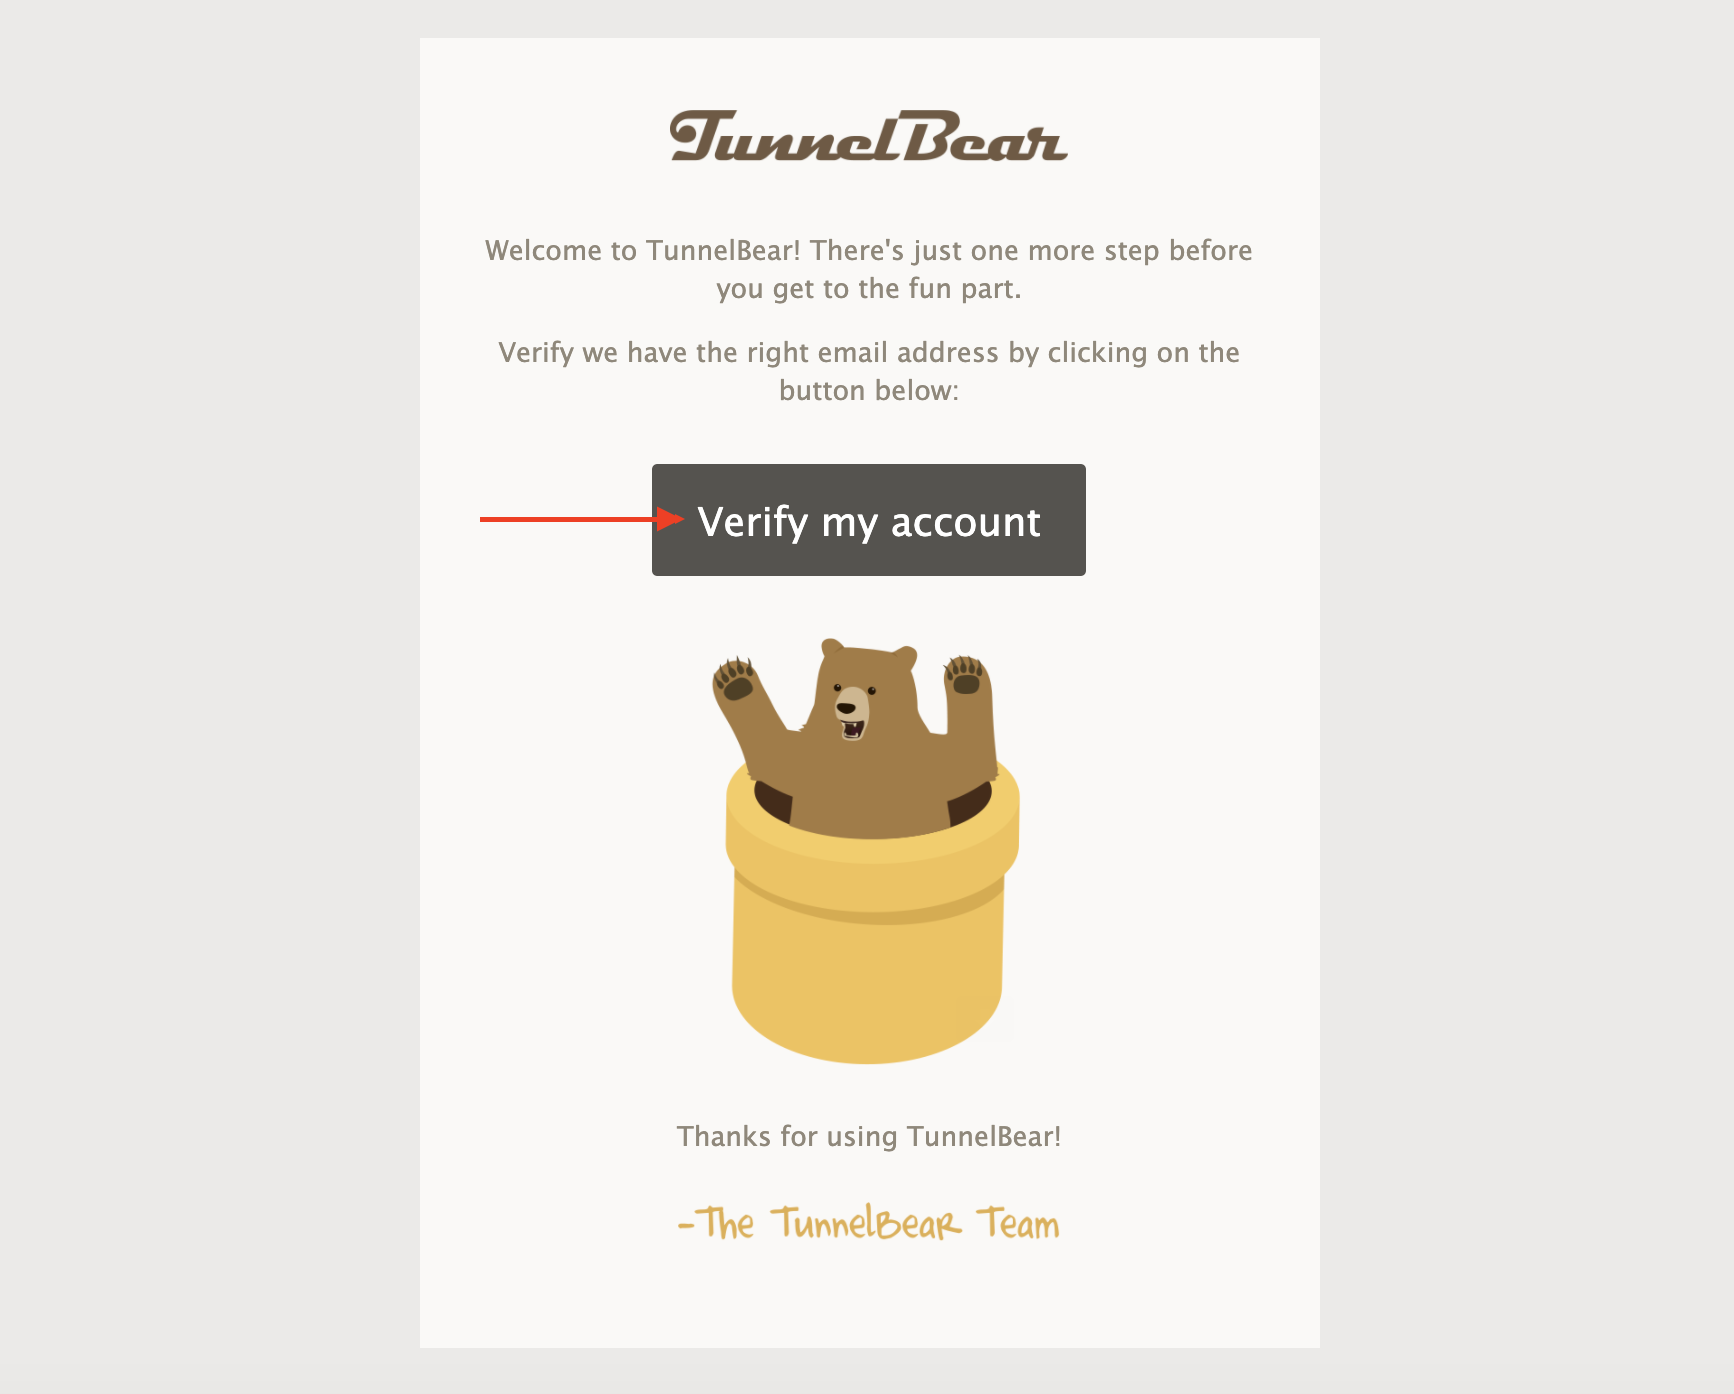
If you just signed up, check your email for a verification from TunnelBear and click “Verify my account”. If you already have an account, you can skip to Get Connected.
In the TunnelBear app, click “OK, verified” to bring you to the map.

Get Connected
Click the arrow next to the tunnel name (in this example, "Fastest") to display the country list.

Click the country you'd like to connect through.

You’re all set and ready to tunnel.

Your Bear is excited to help keep your internet connection secure, but if you have any questions about TunnelBear, our friendly Support Bears are always available.
Happy tunneling!
Visit/Rate Article -
iOS Setup Guide
In this guide, we’ll show you how to set up TunnelBear for iPhones and iPads running iOS 12 or newer.
Download the TunnelBear app
First, you'll have to download the TunnelBear app from the App Store. Open the App Store by tapping the App Store icon on your iPhone/iPad.
Search for TunnelBear.

Tap the install/download button in the top right to download the TunnelBear app.
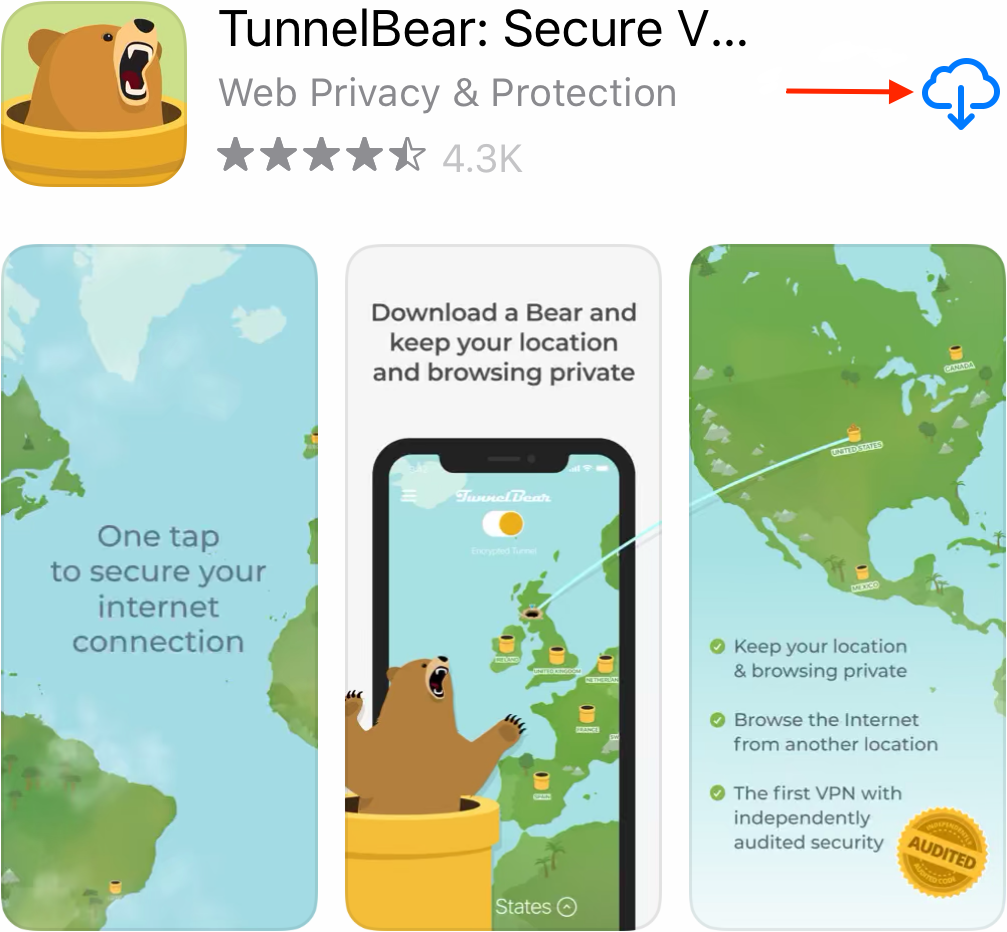
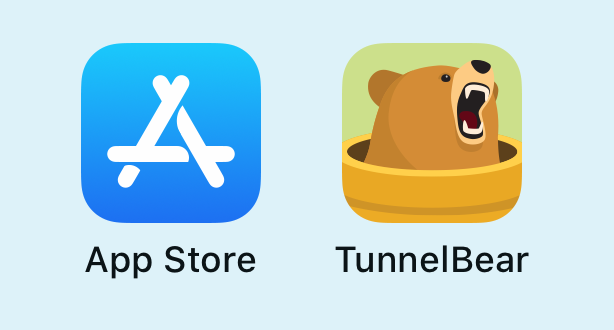
Tap the TunnelBear app when it’s finished downloading.
Create a TunnelBear Account
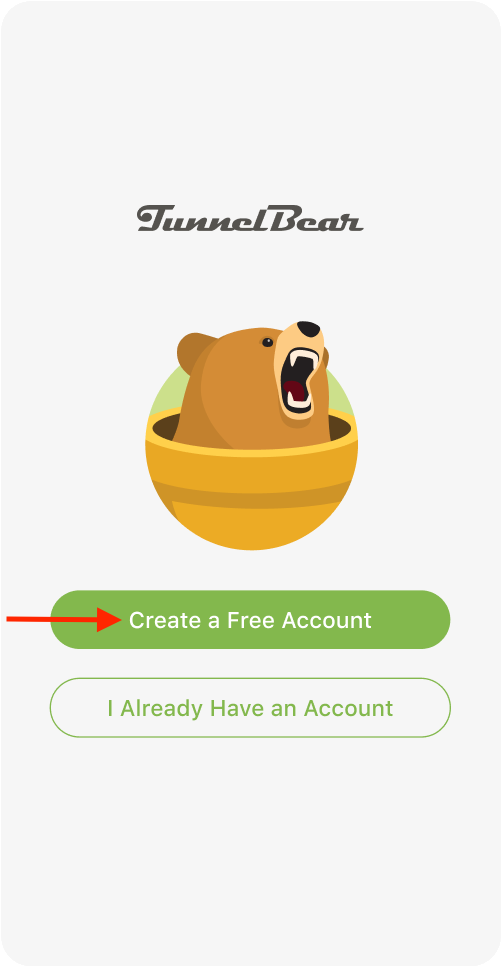
Tap “Create a Free Account” if you haven’t already signed up for TunnelBear.
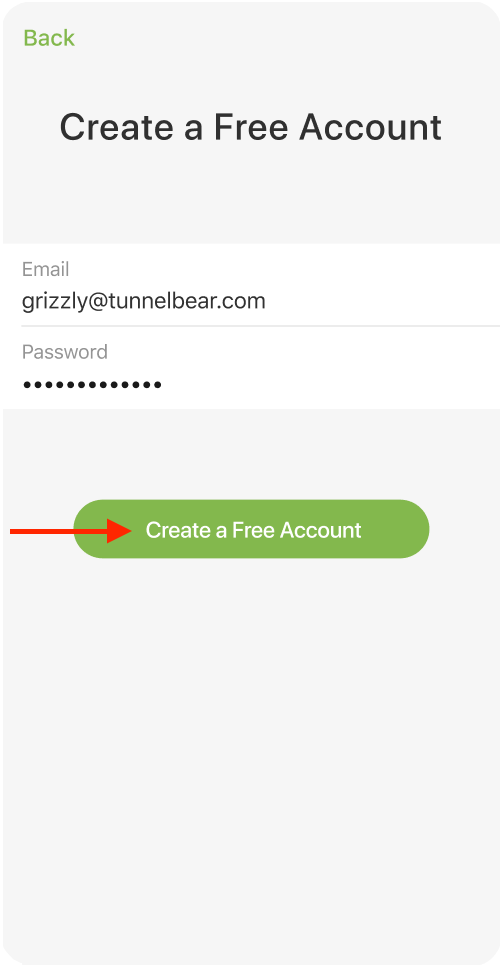
Enter your email address and create a strong password. Then, skip to Install the VPN Profile.
Log In with an Existing Account
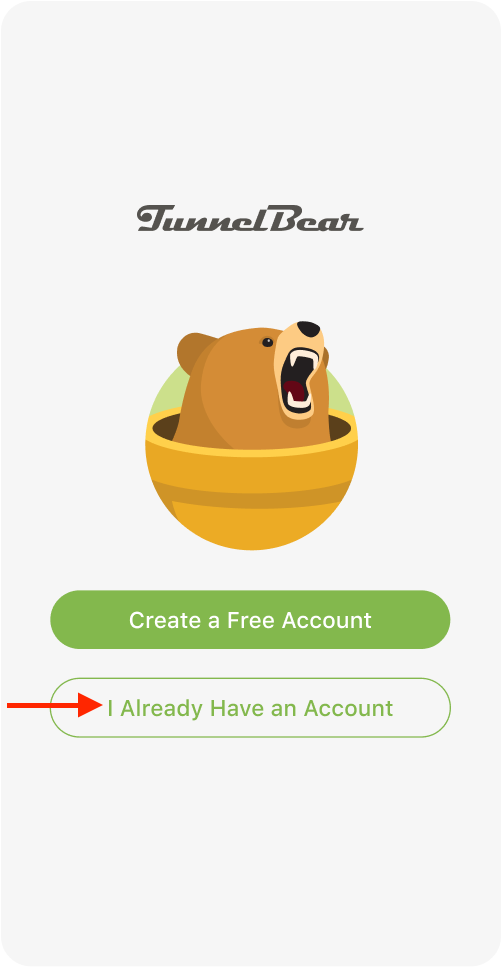
Tap “I Already Have an Account” if you've already signed up.
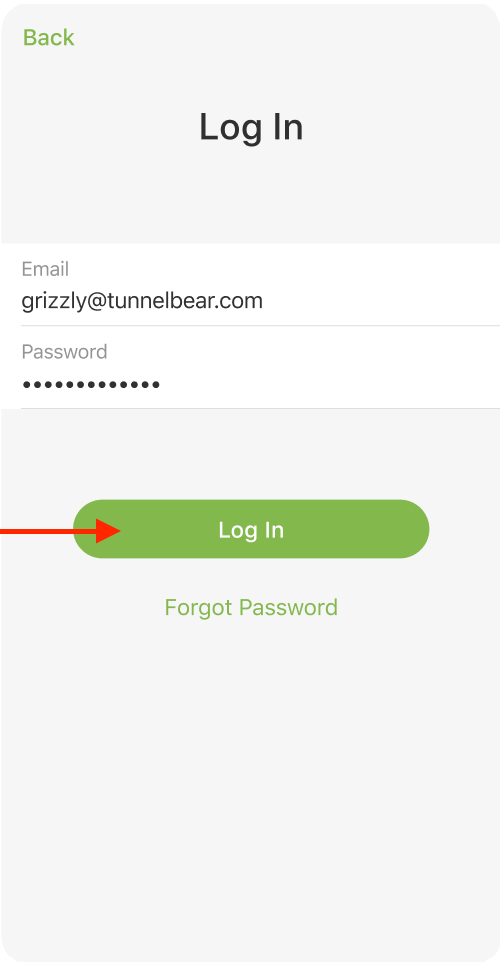
Enter the account email and password you used at signup.
Install the VPN Profile
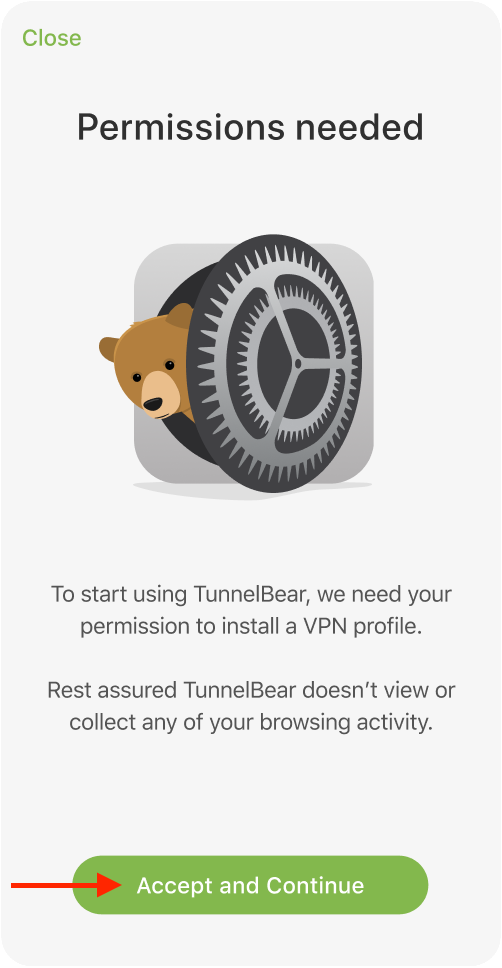
Tap “Accept and Continue” to open the permission window for TunnelBear to add a VPN profile.
TunnelBear will not work properly unless you tap “Allow” when TunnelBear asks for permission to add VPN configurations.
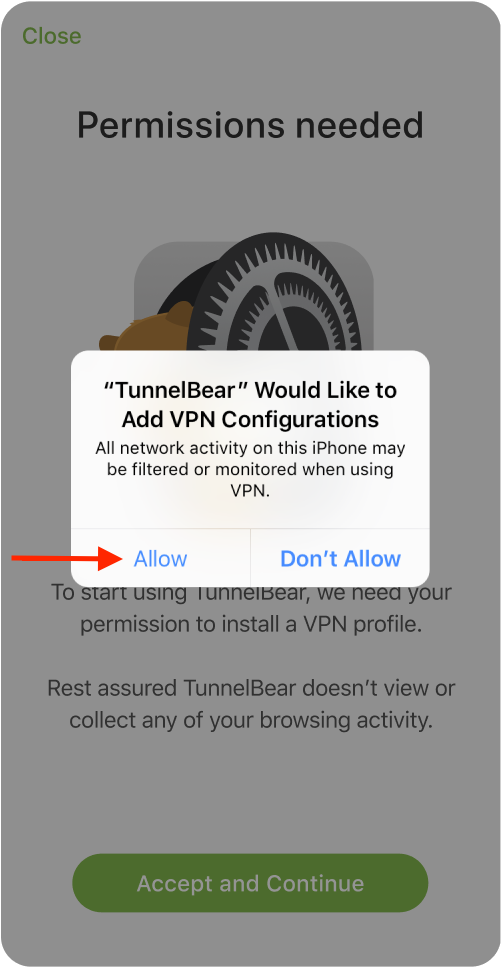
Note: This is a standard warning from iOS since VPNs have the ability to monitor your activity. TunnelBear will NEVER do this. For more information on why you can trust TunnelBear, visit this help article.
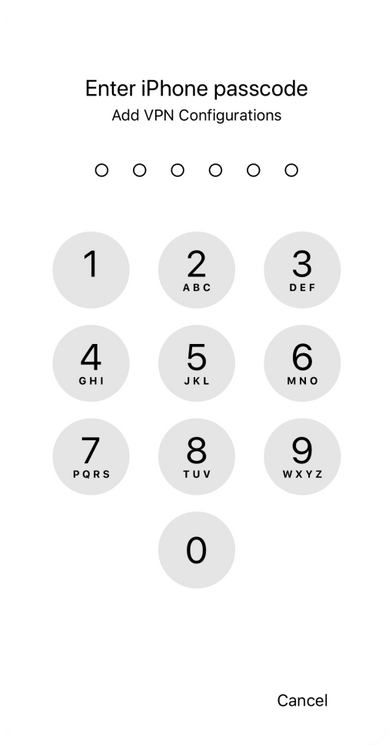
Enter your device passcode to verify the new settings.
Verify Your Email
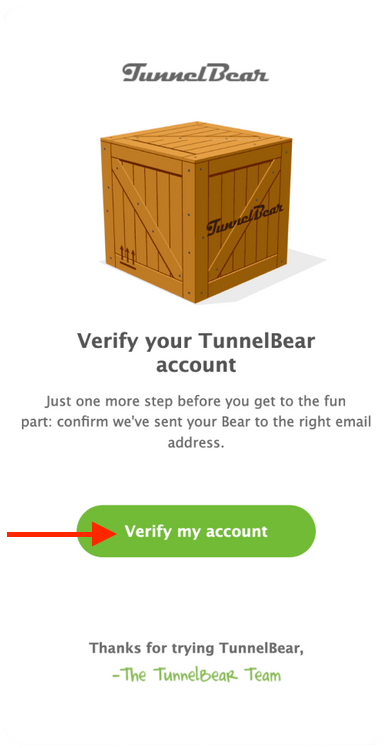
If you just signed up, check your email for a verification from TunnelBear and tap “Verify my account”. If you already have an account, you can skip to Get Connected.
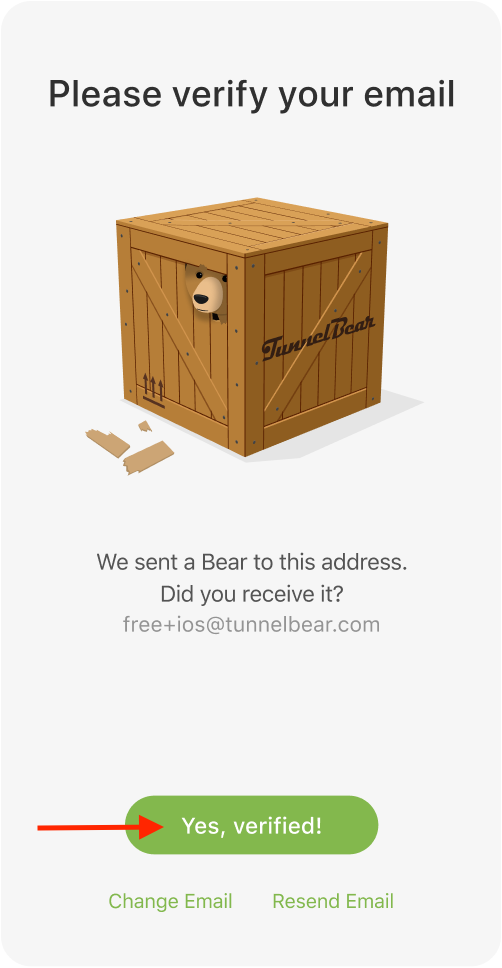
In the TunnelBear app, tap, “Yes, verified” to bring you to the map.
Get Connected
Tap country bar arrow in the bottom right corner of the screen to access the countries list.
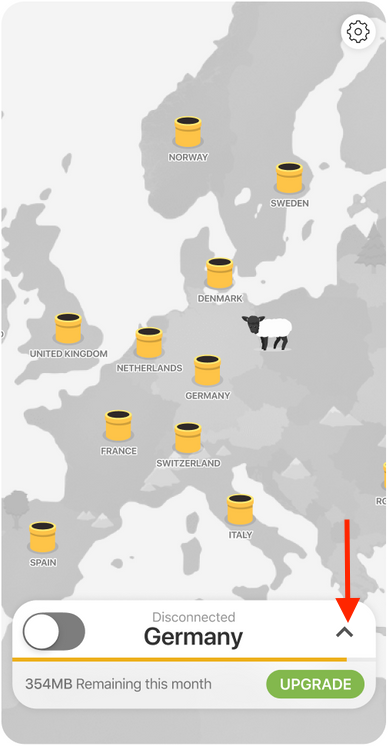
Tap the country you'd like to connect through.
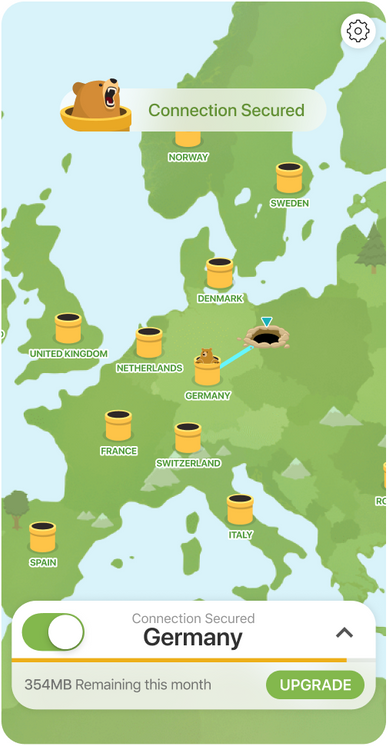
You’re all set and ready to tunnel.
Your Bear is excited to help keep your internet connection secure, but if you have any questions about TunnelBear, our friendly Support Bears are always available.
Happy tunneling!
Visit/Rate Article -
MacOS Setup Guide
In this guide, we’ll show you how to set up TunnelBear for your MacOS computer running 10.12 or newer.
Download the TunnelBear app
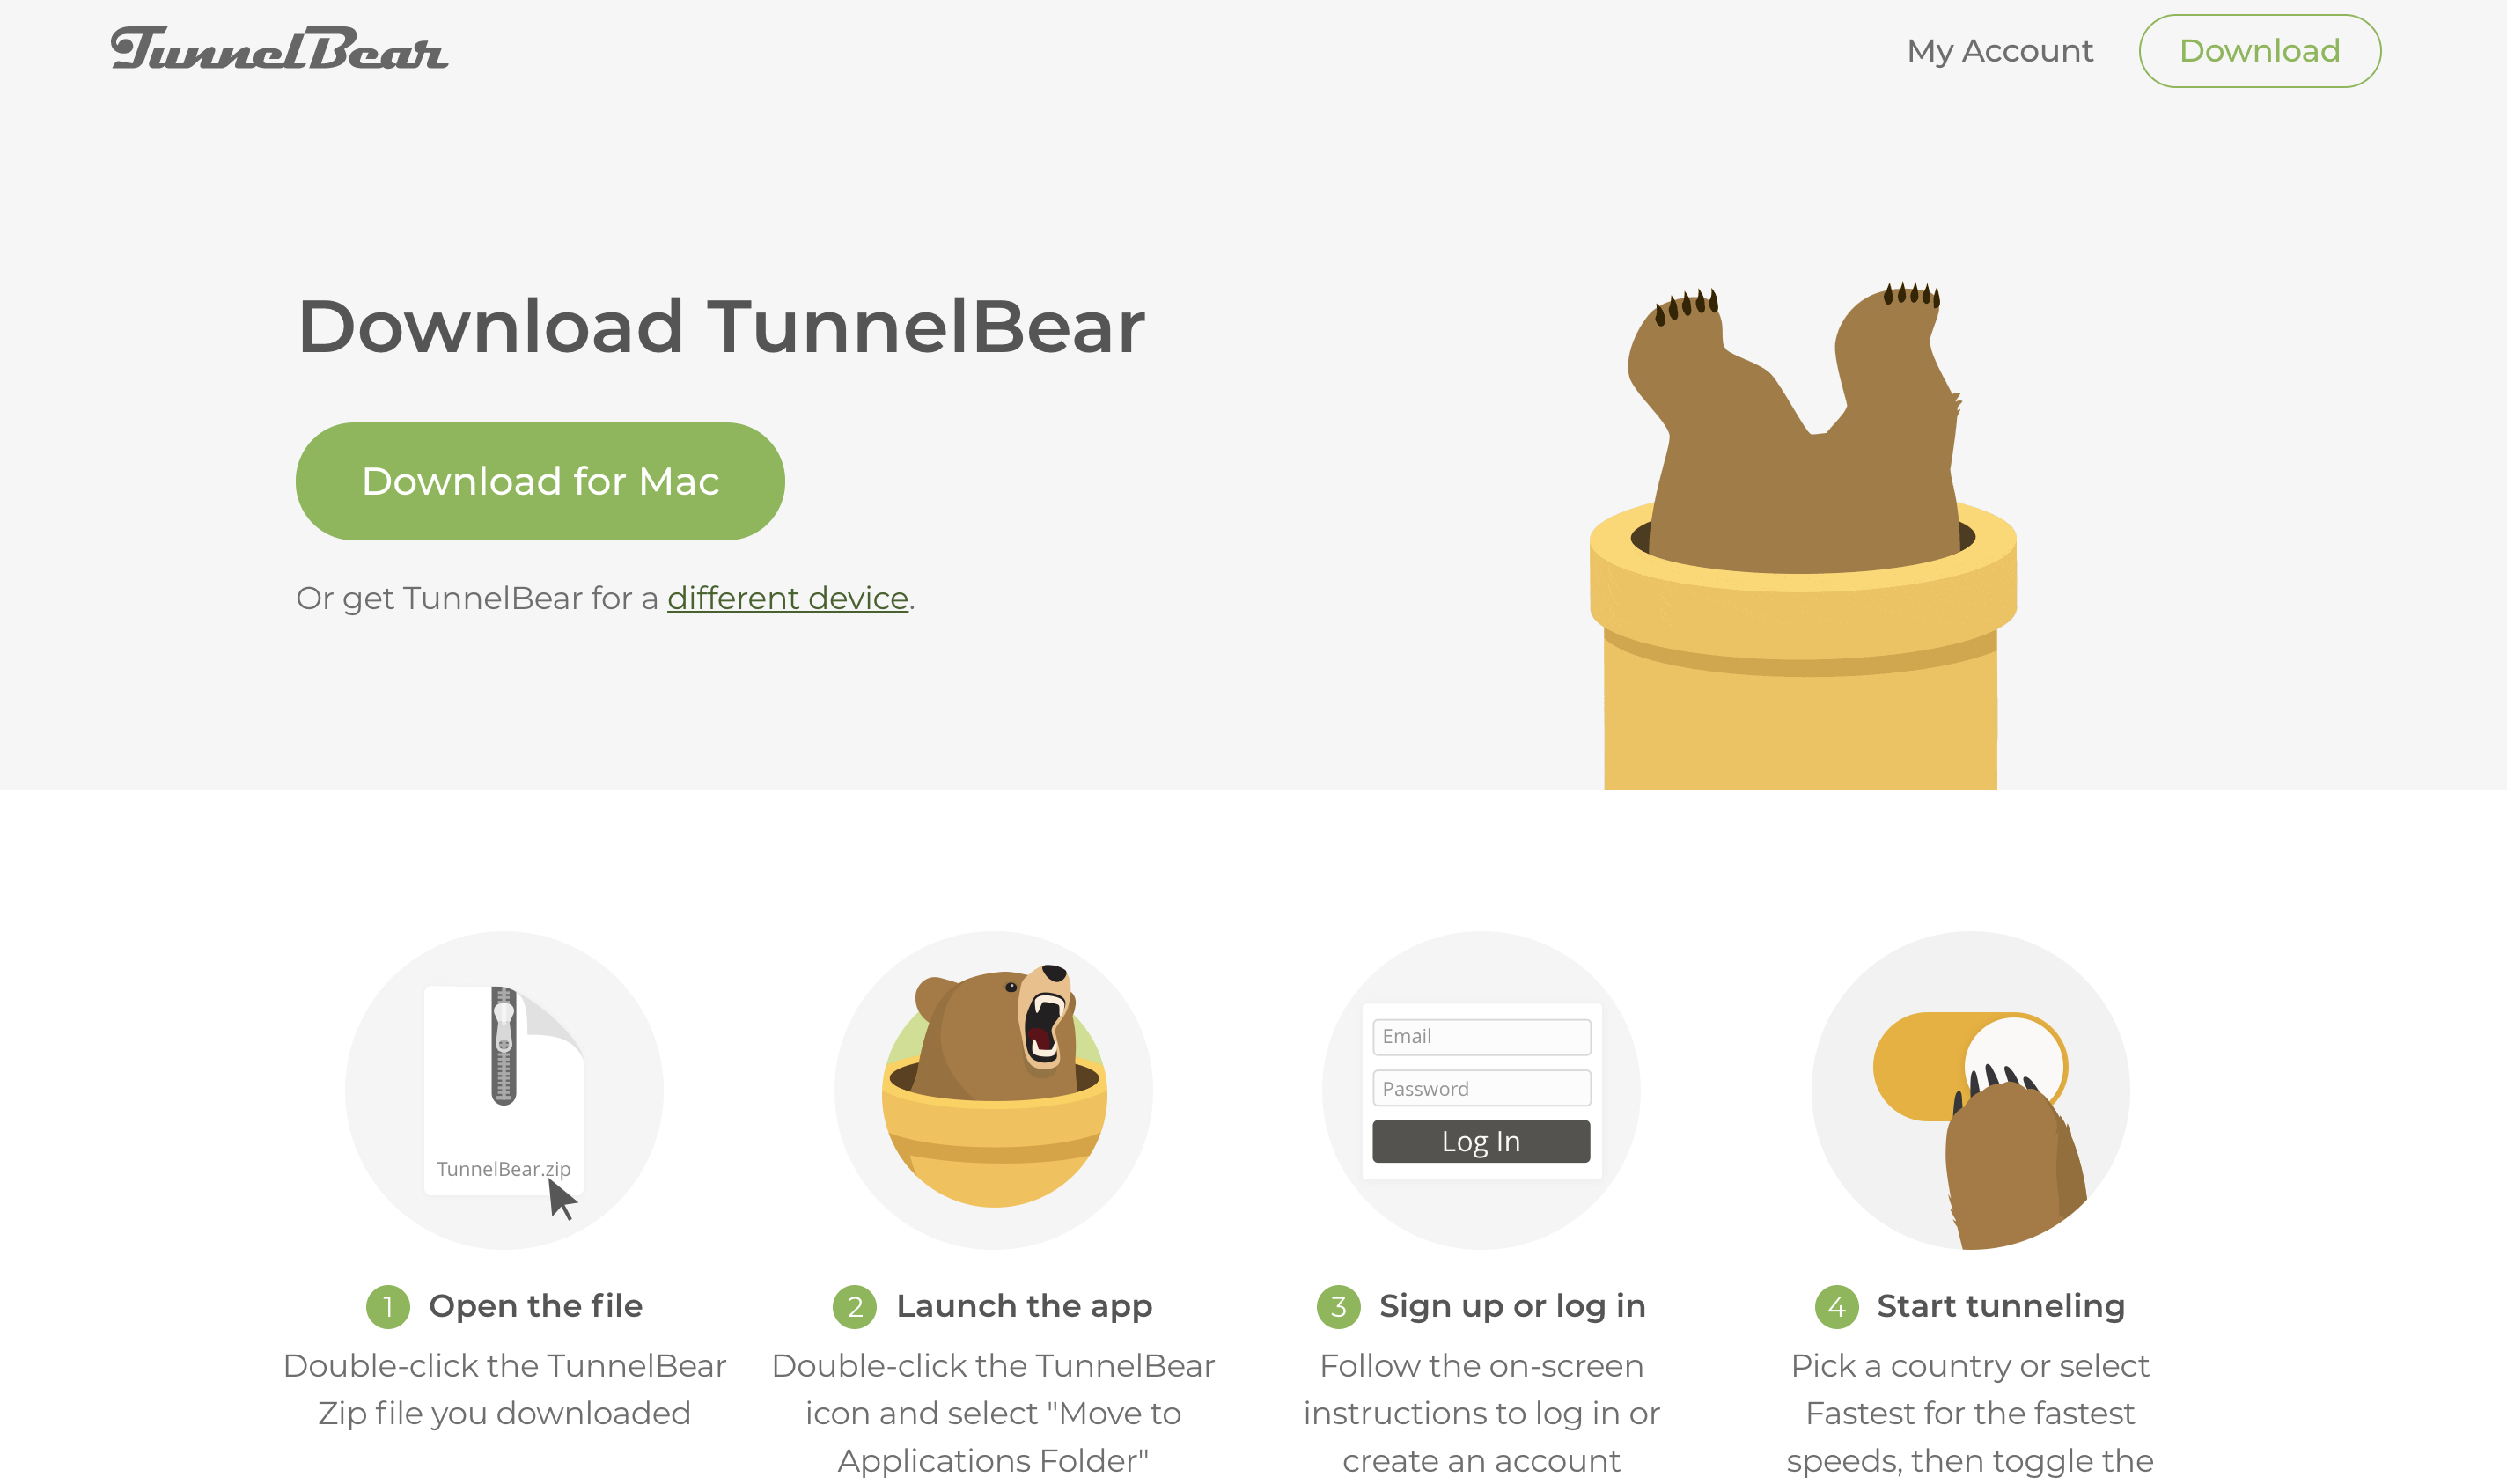
First, you'll have to download the TunnelBear app from our website. Go to tunnelbear.com/download and wait until the download finishes.
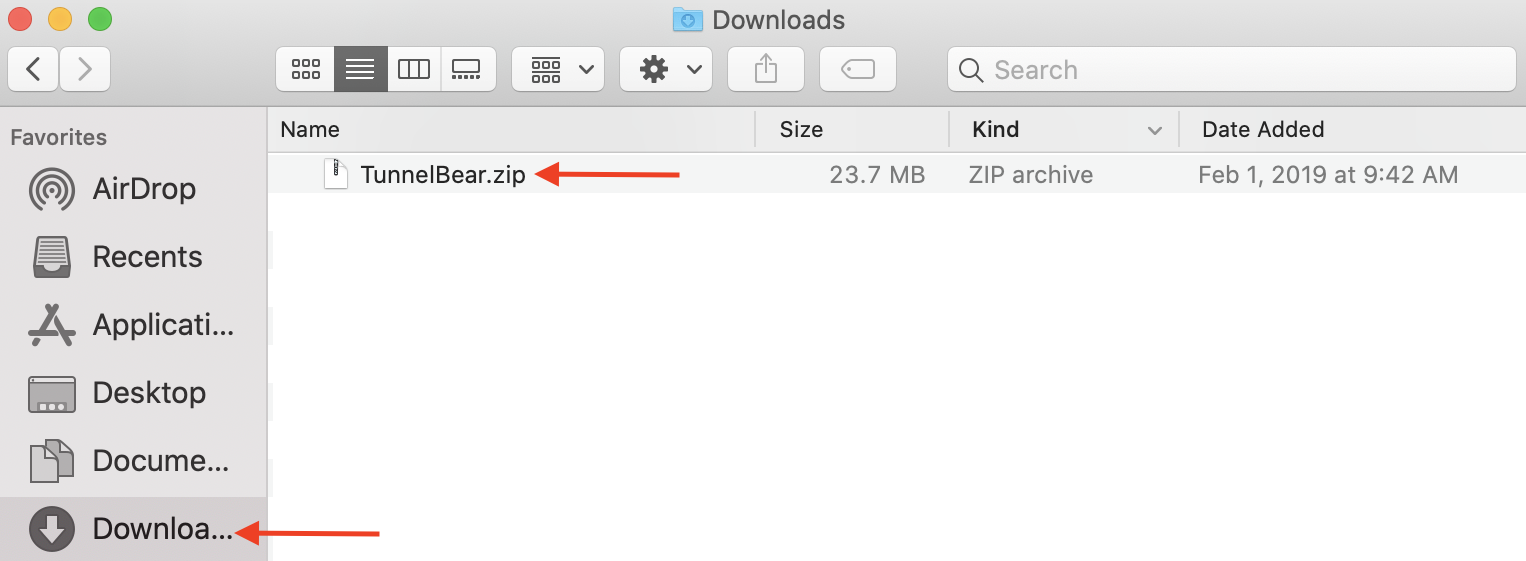
Open your Downloads folder and double click on TunnelBear.zip file to extract the TunnelBear installation file.
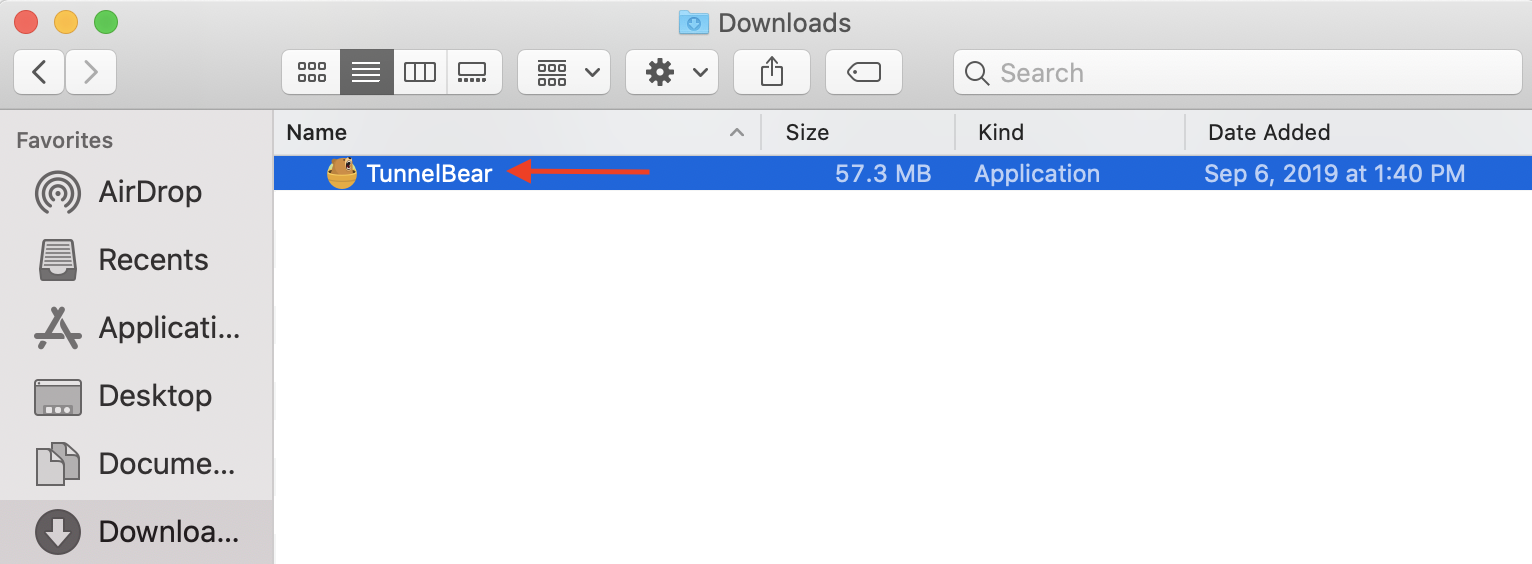
Double click on the TunnelBear installation file to begin installation.
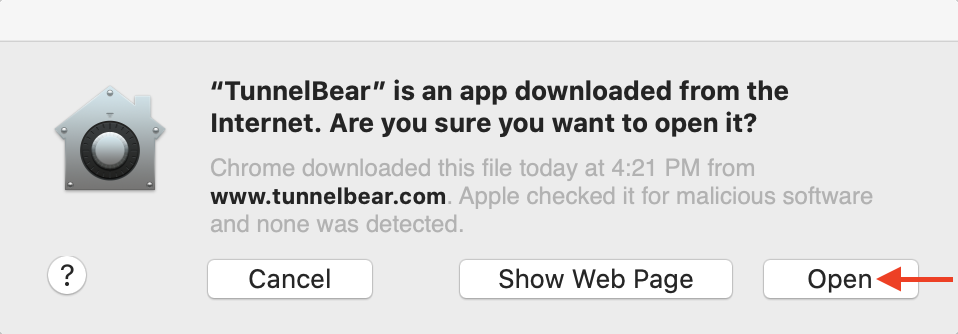
Click on “Open” to open the installation window.
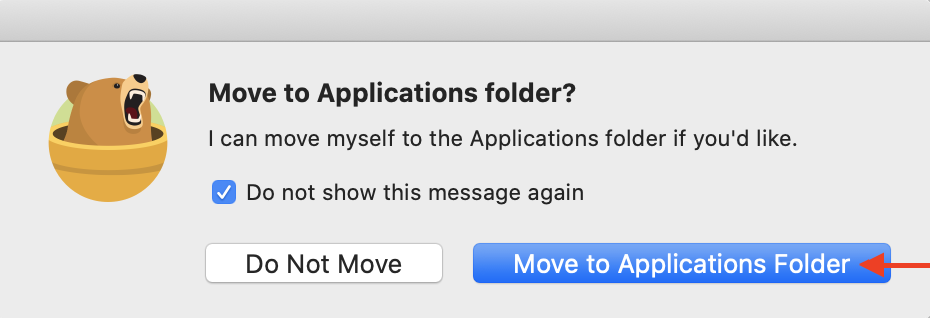
Click on “Move to Applications Folder” to save TunnelBear on your Applications Folder. Check the box “Don’t ask again” for future installations.
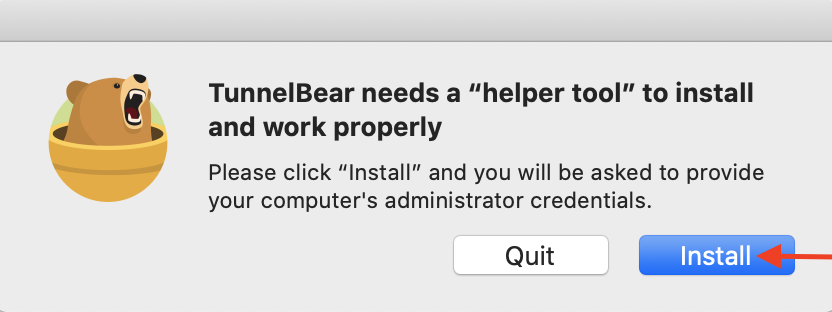
Click on "Install" to install the helper tool, which is necessary for your Bear to connect to our servers. For more information on the helper tool, check out this article.
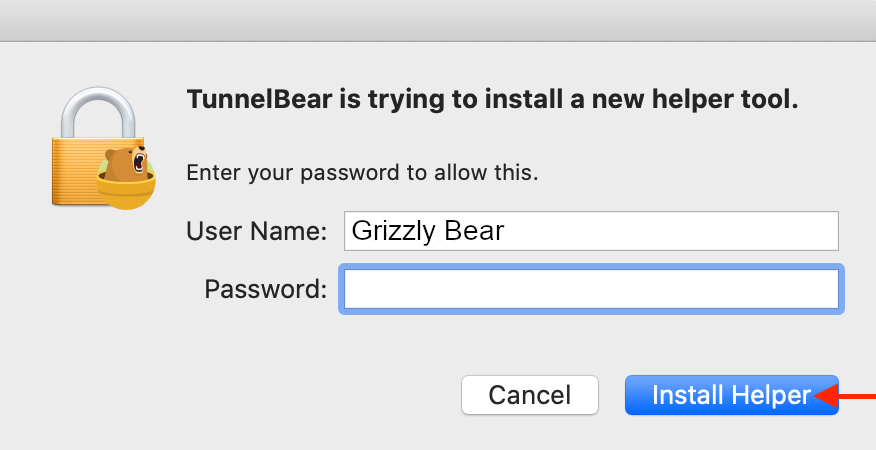
Enter your computer's administrator password to allow the helper tool to install (Note: This is the same password you use to unlock your computer or install new programs, not your TunnelBear password). The User Name should be filled out by default.
Create a TunnelBear account
Create a Free Account if you haven’t already signed up for TunnelBear.
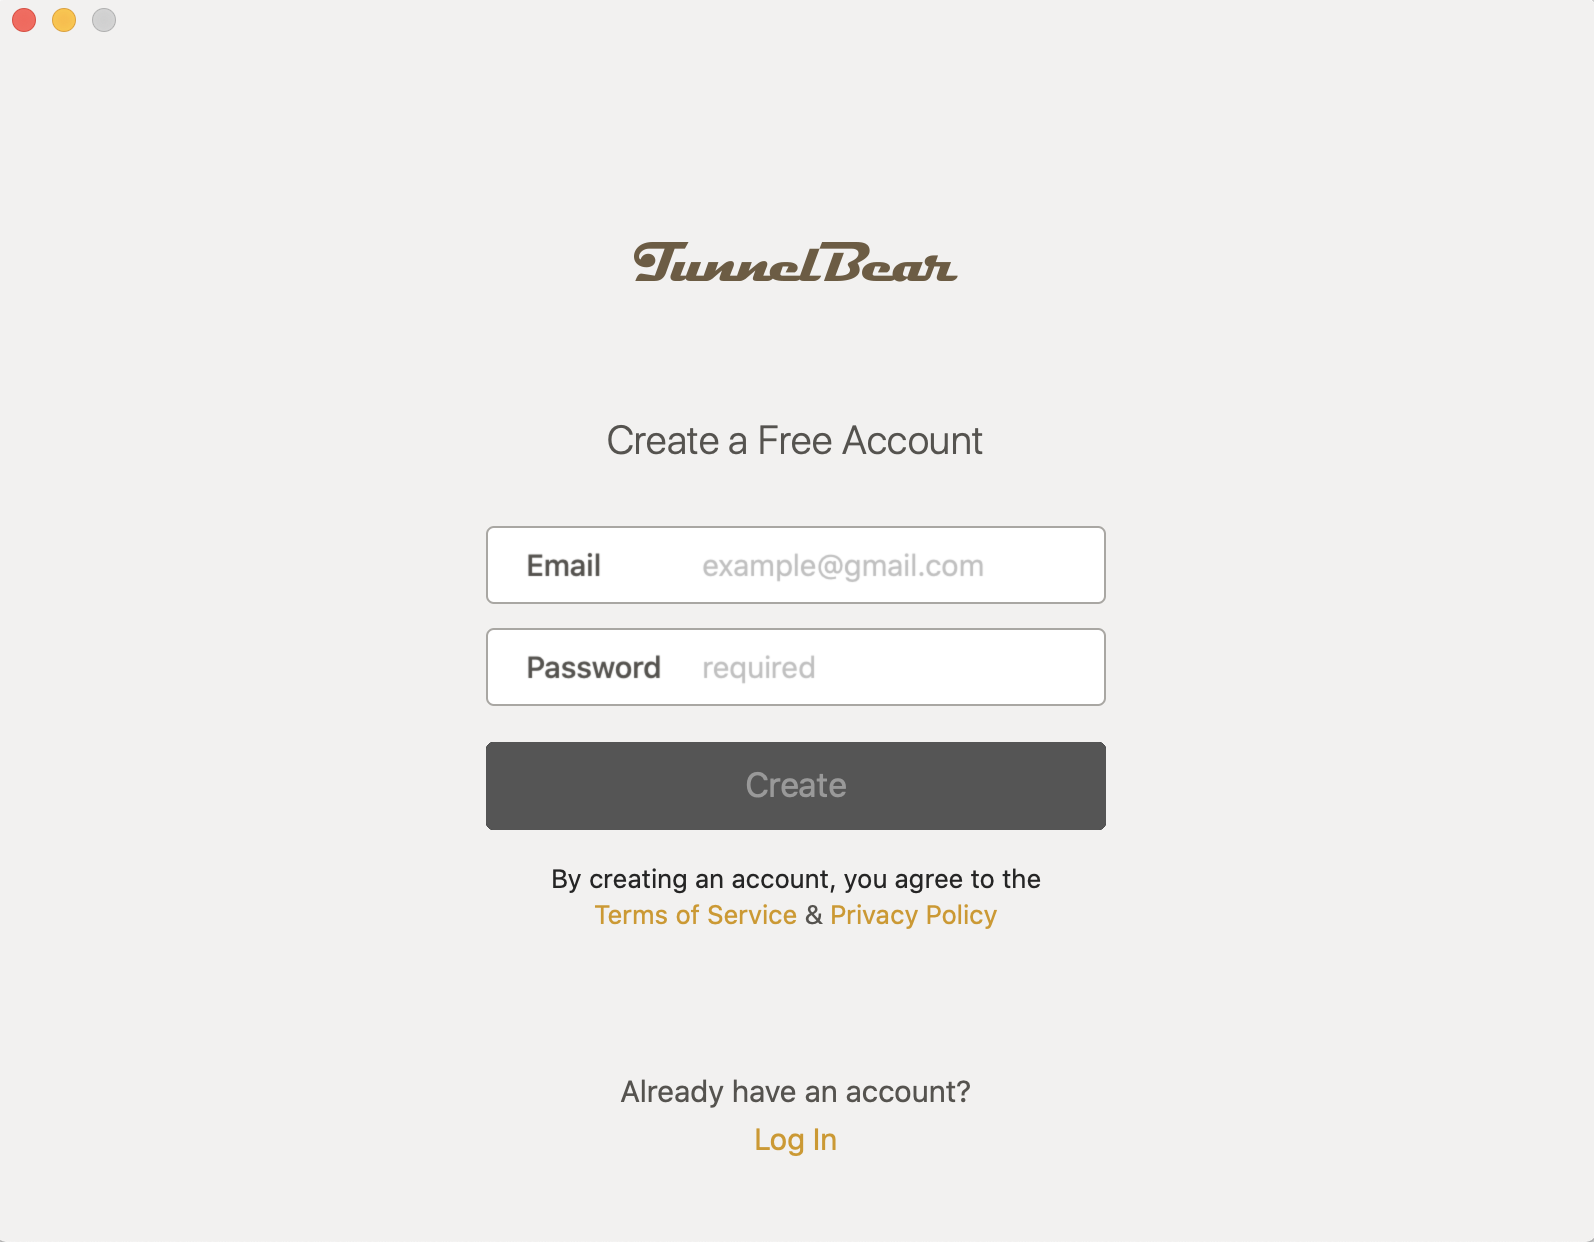
Enter your email address and create a strong password, click "Create" and then skip to Verify Your Email.
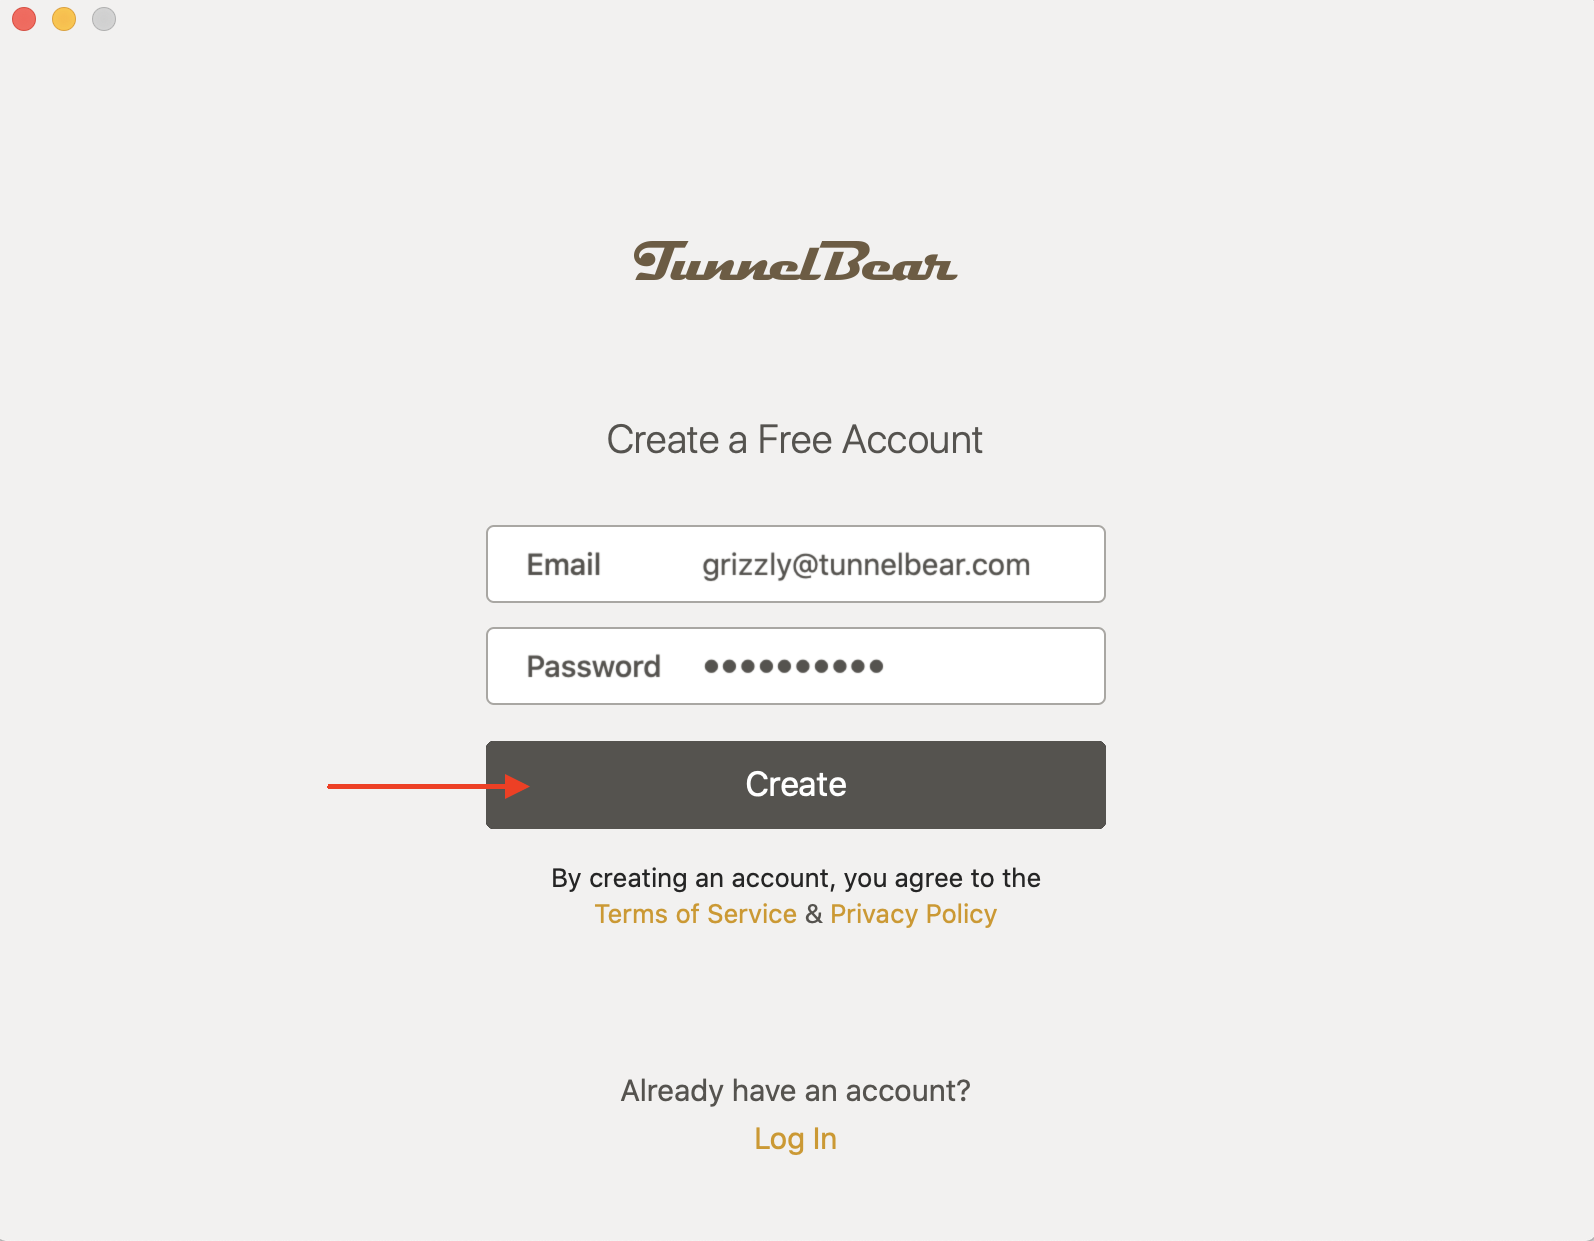
Log In with an Existing Account
Click "Log in" under "Already have an account?" if you've already signed up.

Enter the account email and password you used at signup.

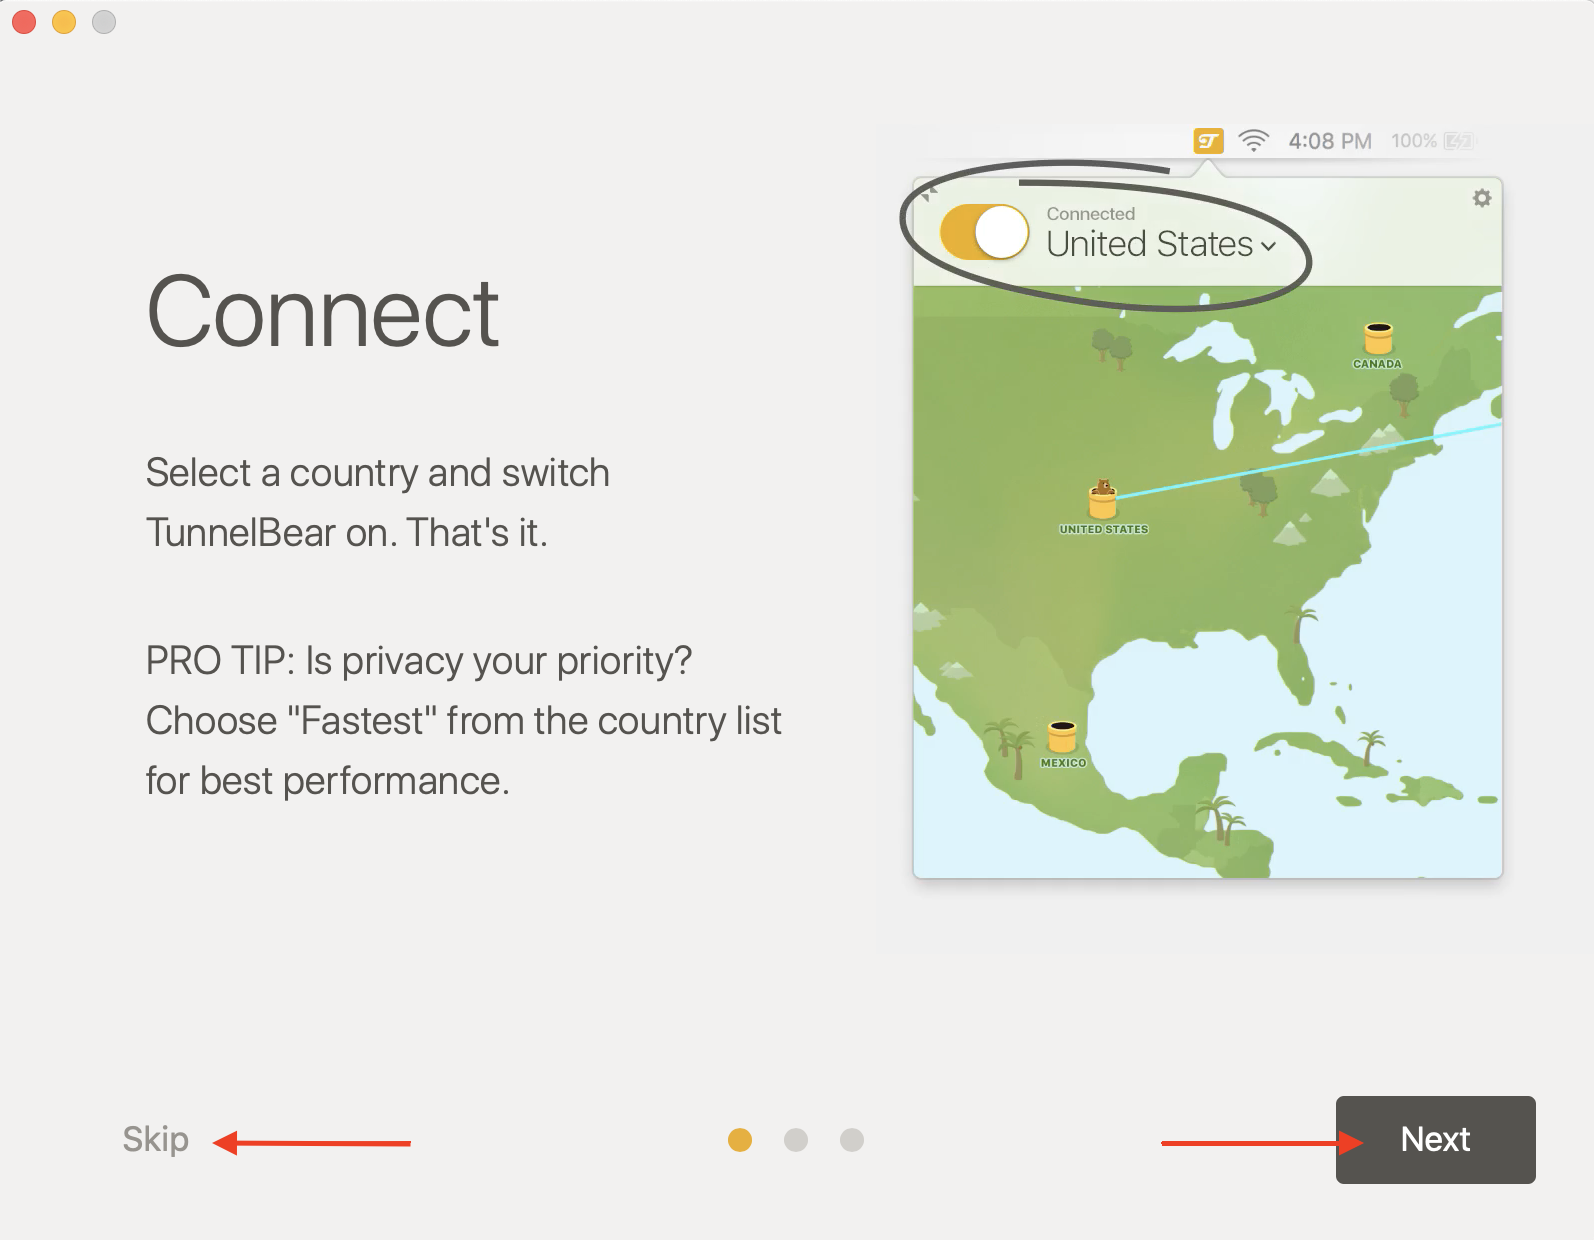
Read the Quick Guide by clicking on the “Next” button or click on “Skip” to continue.
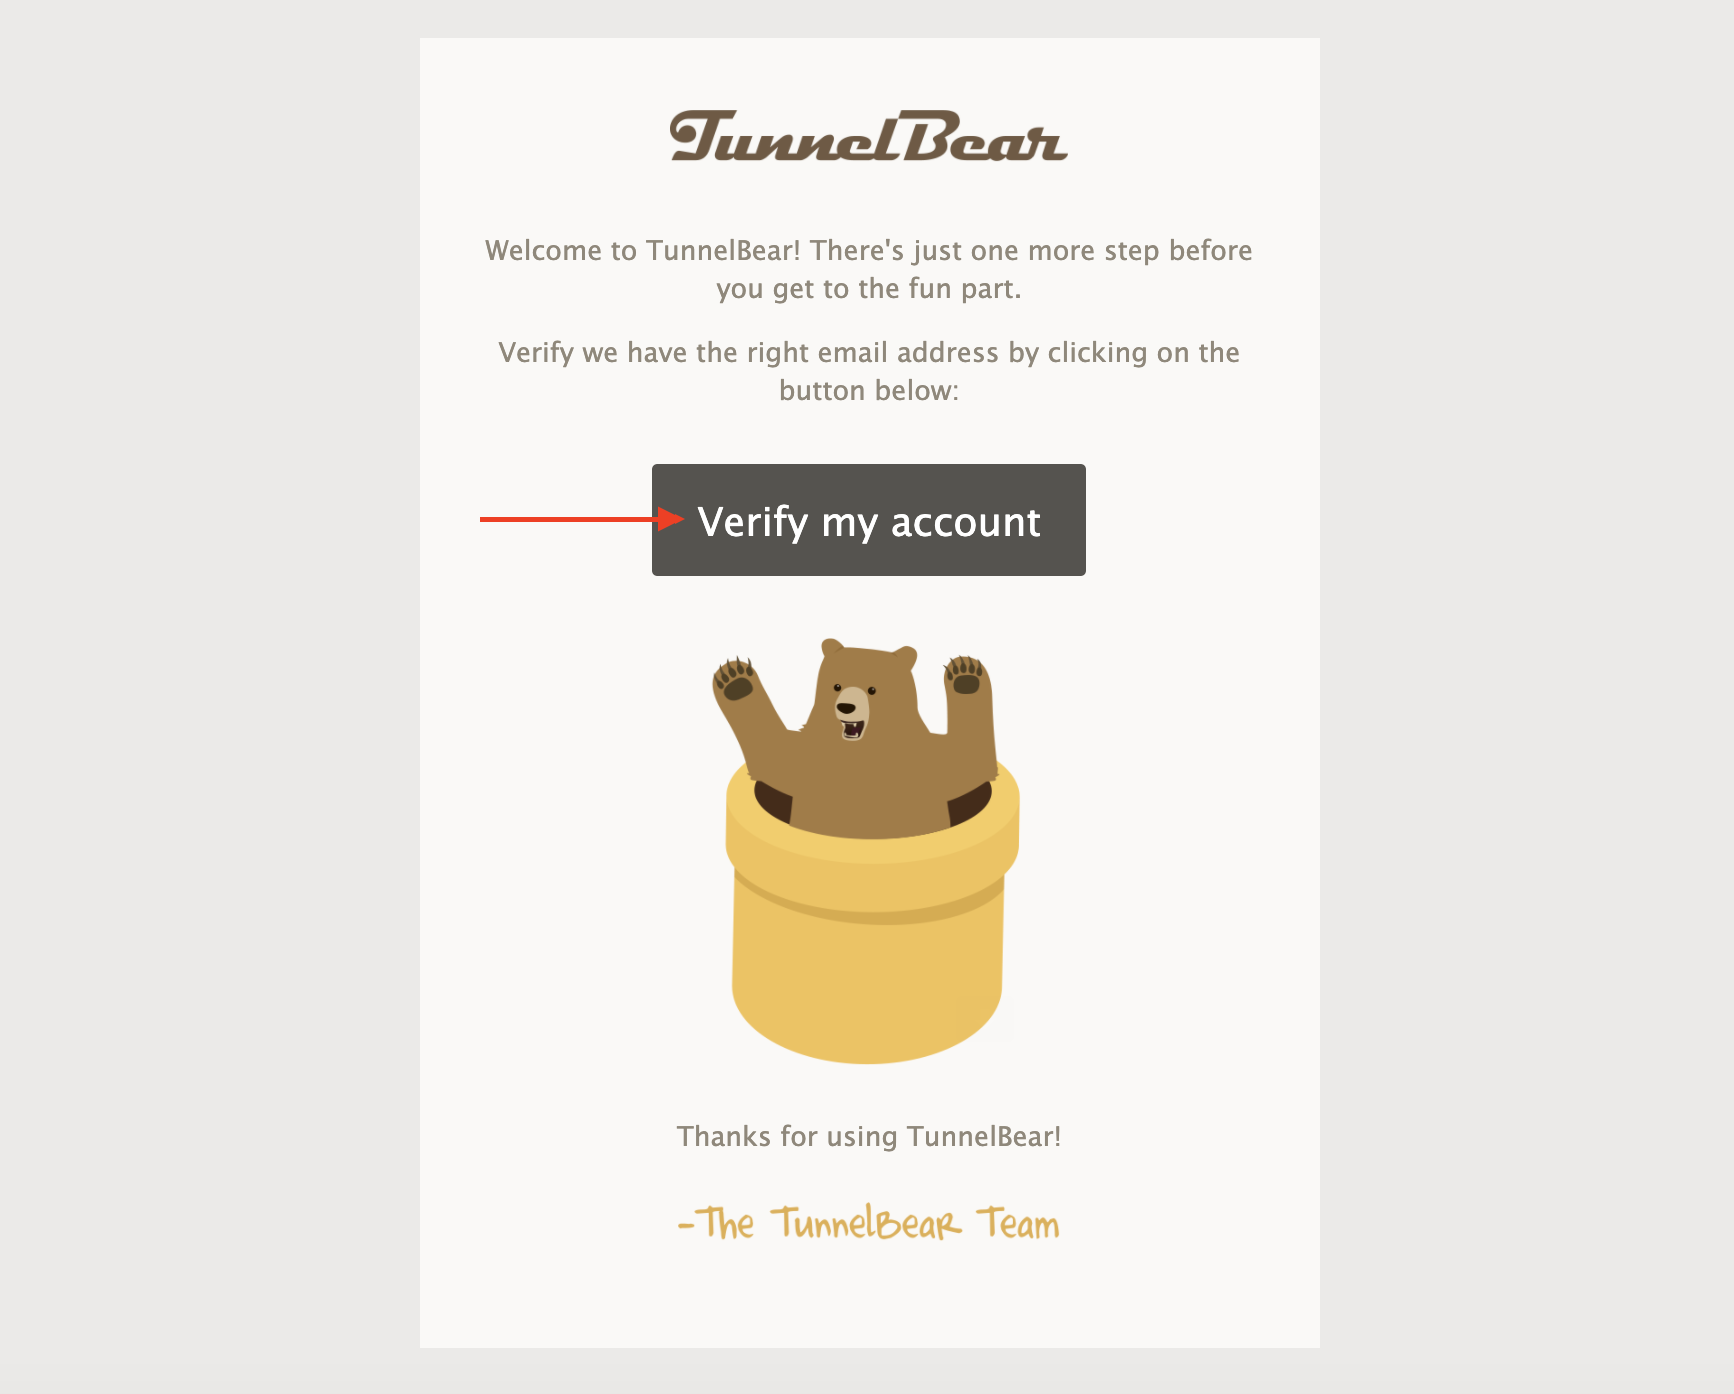
Verify Your Email
If you just signed up, check your email for a verification from TunnelBear and click “Verify my account”. If you already have an account, you can skip to Get Connected.
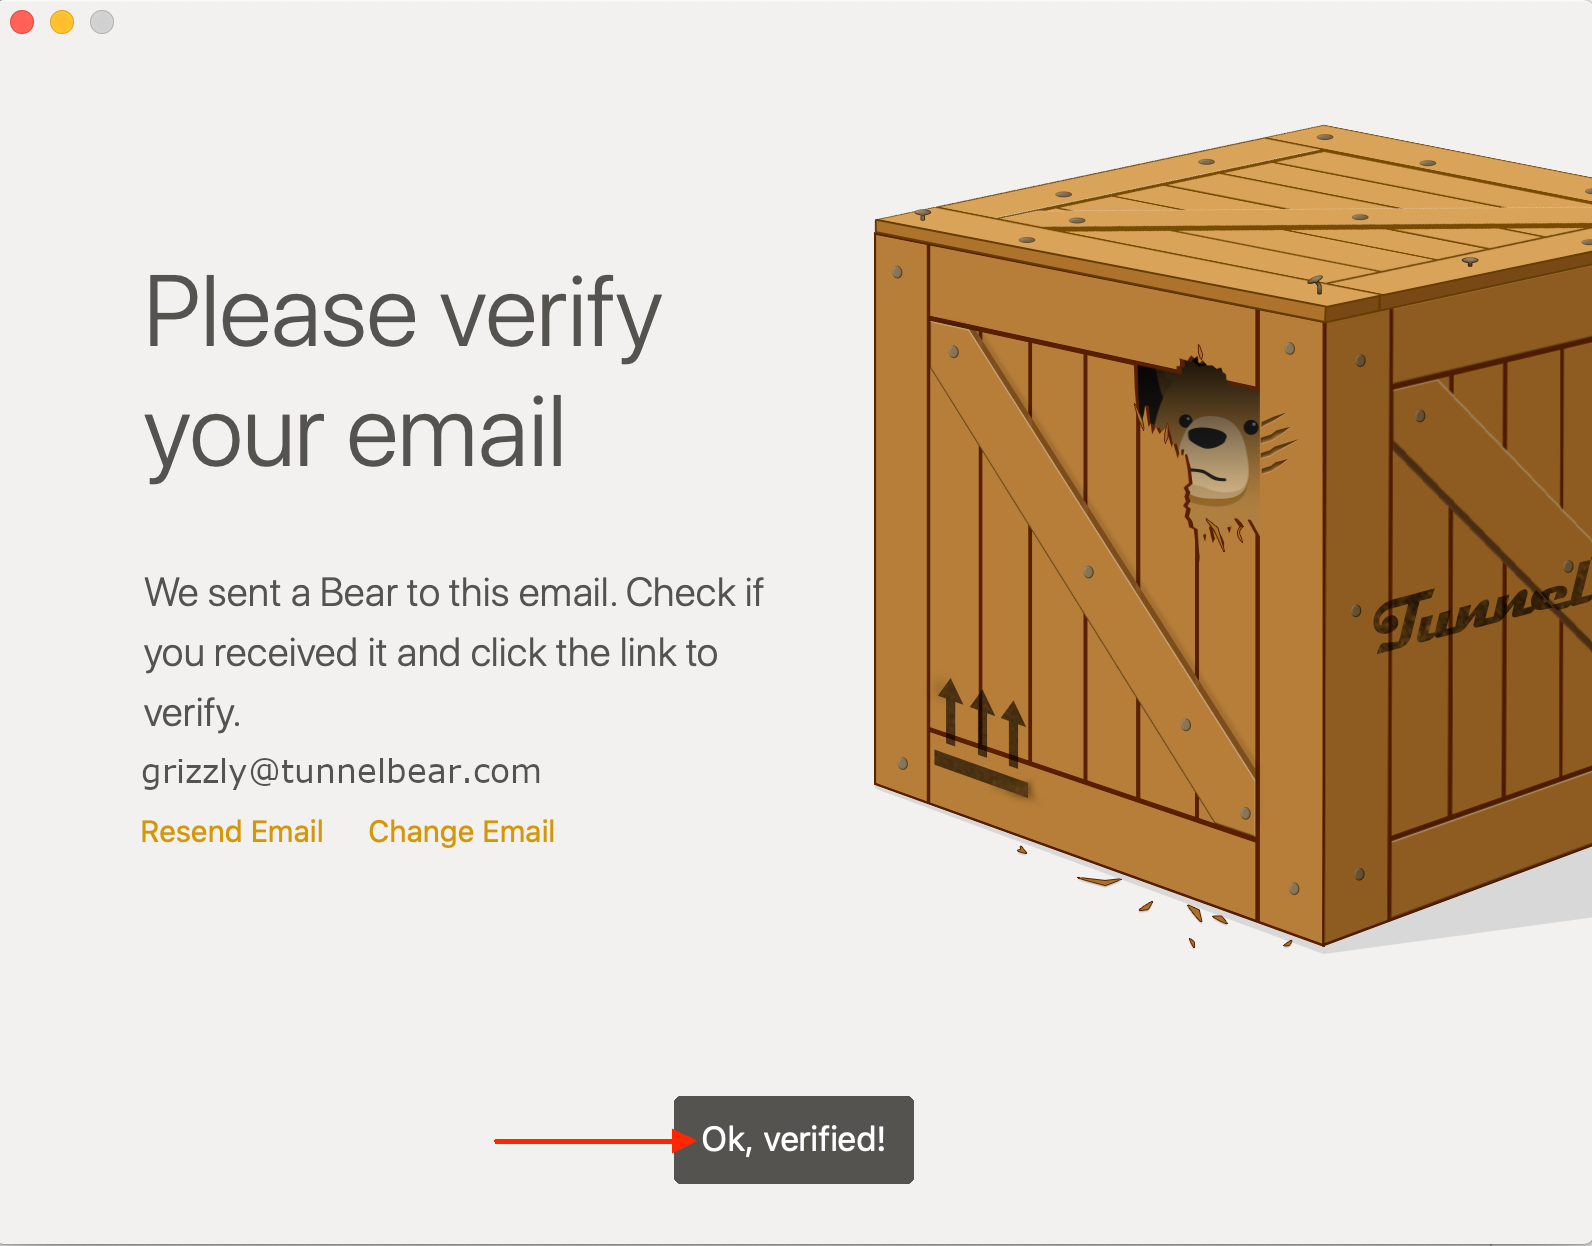
In the TunnelBear app, click “Ok, verified!” to bring you to the map.
Get Connected
Click the arrow next to the tunnel name (in this example, "Fastest") to display the country list.
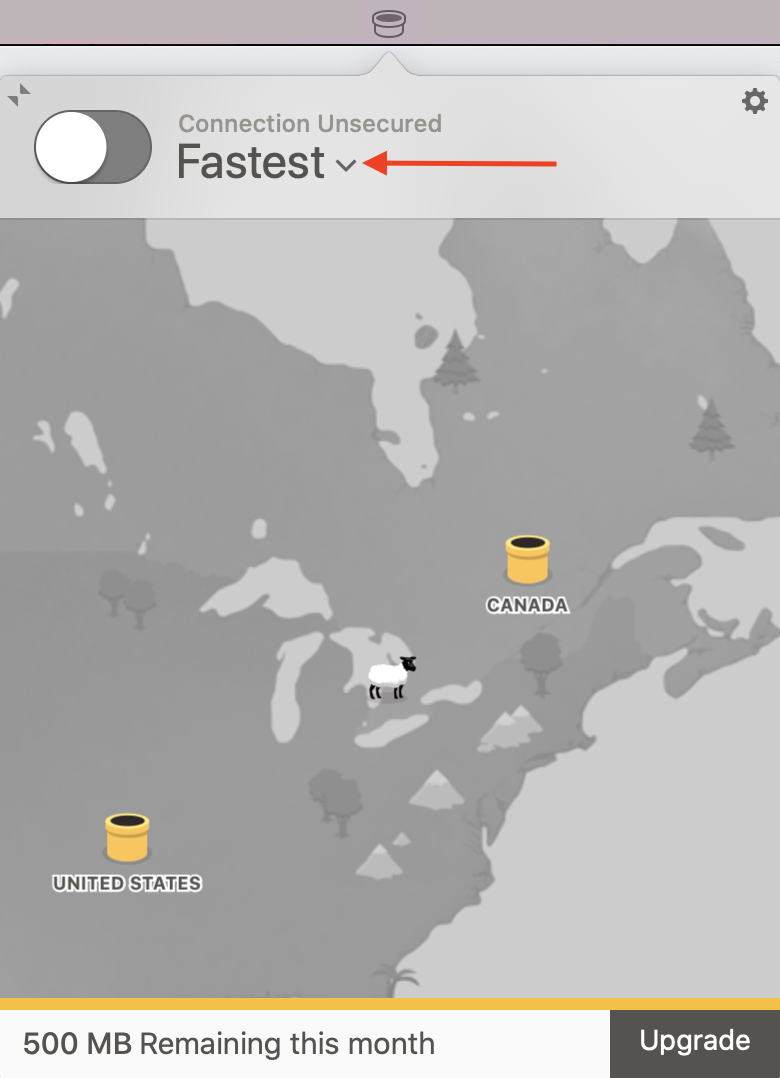
Click the country you'd like to connect through.

You’re all set and ready to tunnel.
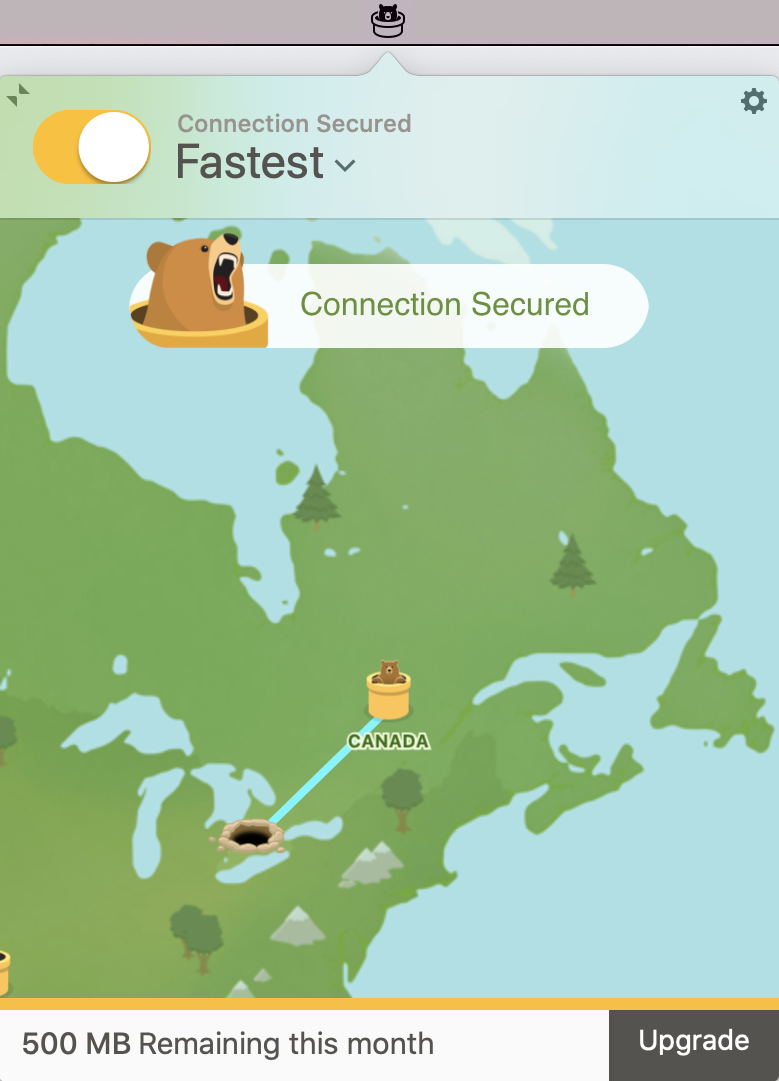
Your Bear is excited to help keep your internet connection secure, but if you have any questions about TunnelBear, our friendly Support Bears are always available.
Happy tunneling!
Visit/Rate Article -
Chrome Extension Setup Guide
In this guide, we’ll show you how to set up TunnelBear for your Chrome Browser. The TunnelBear extension will ensure that all traffic from your browser is kept private and secure.
Download the TunnelBear app
First, you'll have to download the TunnelBear extension from our website.
Visit our website https://www.tunnelbear.com/apps/browser, then click the ‘Chrome’ button at the bottom of the page.

Click the ‘Add to Chrome’ button on the top right corner of the Chrome Web Store website.
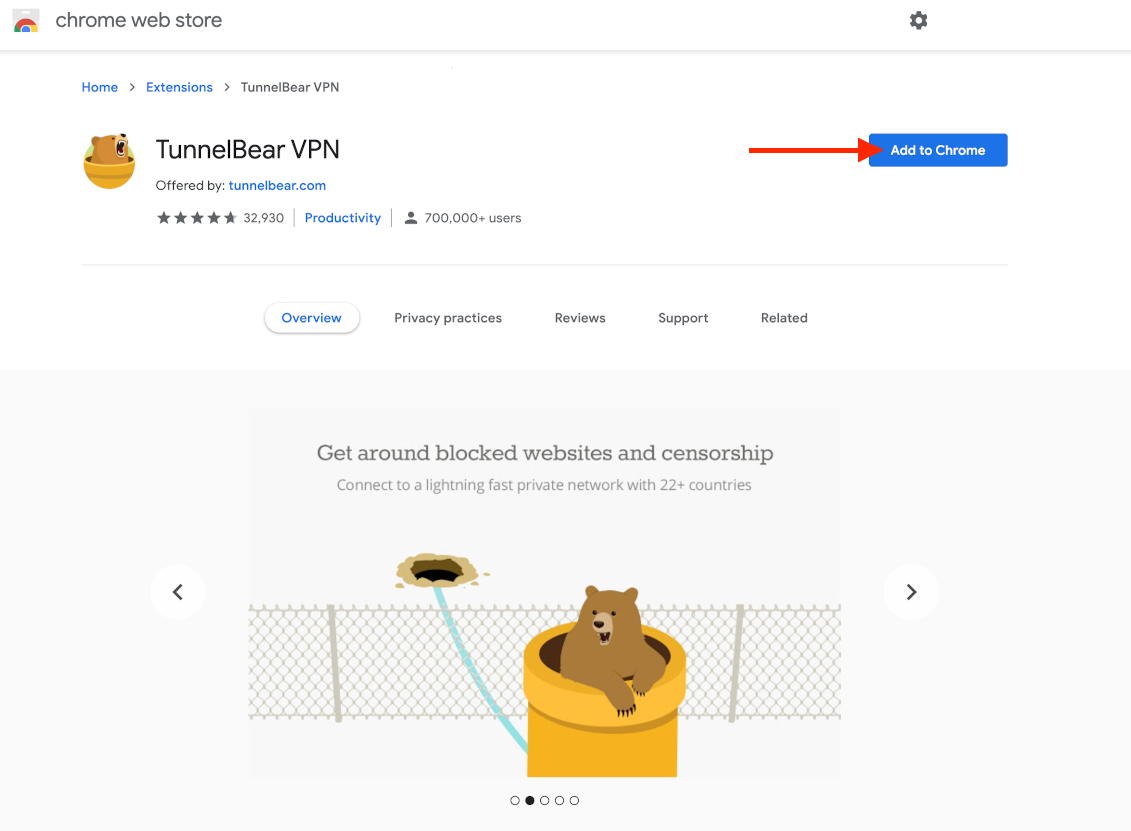
Click on “Add extension” to grant permission for TunnelBear to add the extension.
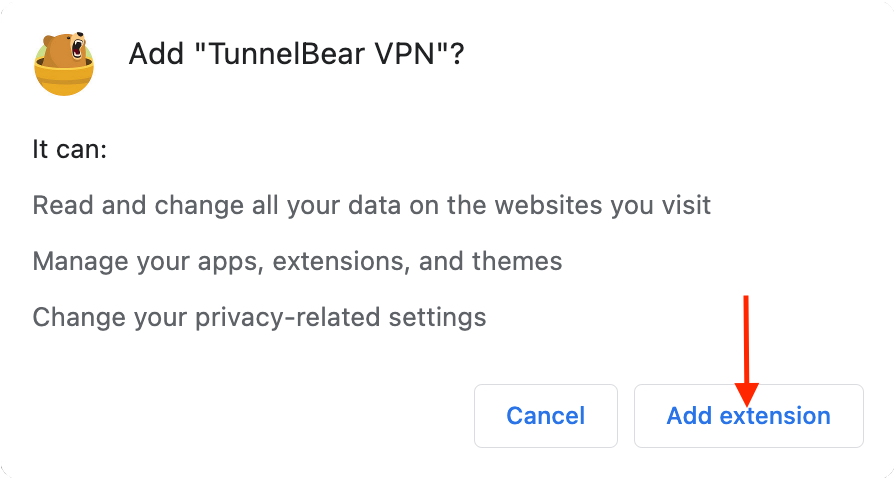
Note: This is a standard warning from Chrome. TunnelBear will never make changes to your browser settings outside of those necessary to set up the VPN connection. For more information on why you can trust TunnelBear, visit this help article.
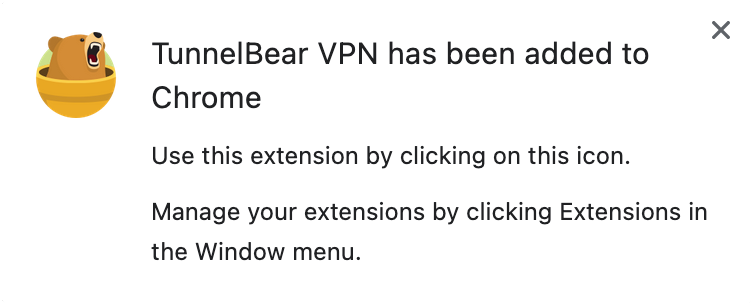
Once the extension is successfully installed, a prompt will appear confirming that “TunnelBear VPN has been added to Chrome”.
Create a TunnelBear Account
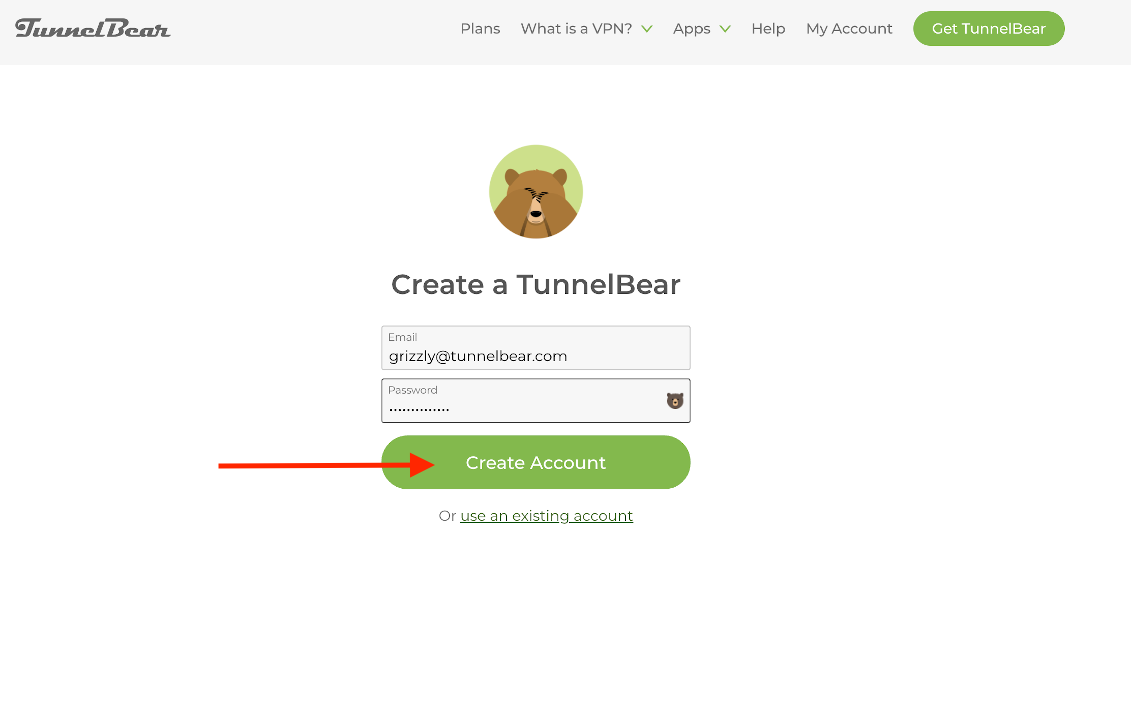
Enter your email address and create a strong password, then click “Create Account” if you haven’t already signed up for TunnelBear.
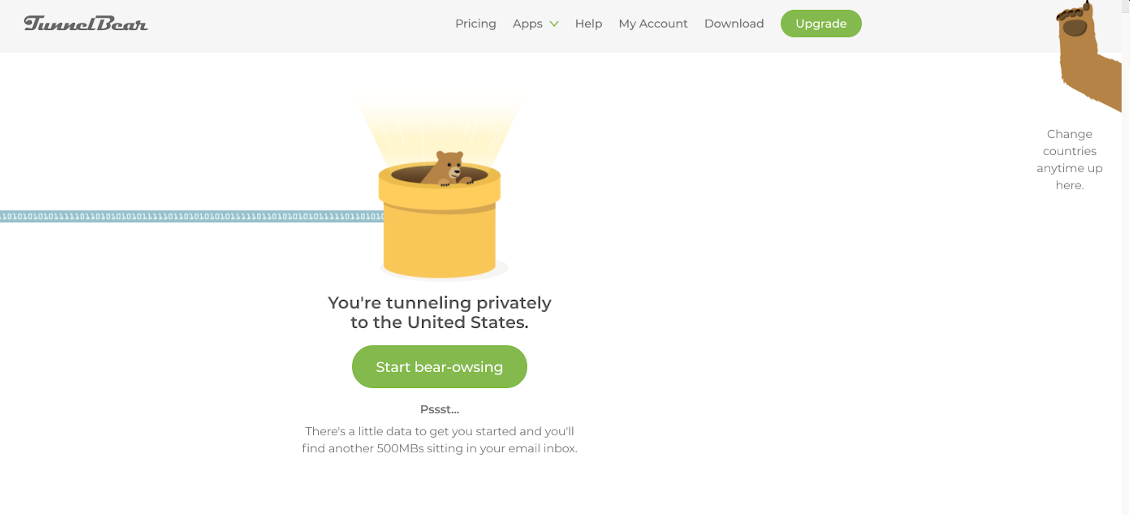
You will see a confirmation to start ‘Bear-owsing’, then skip to Get Connected.
Log In with an Existing Account
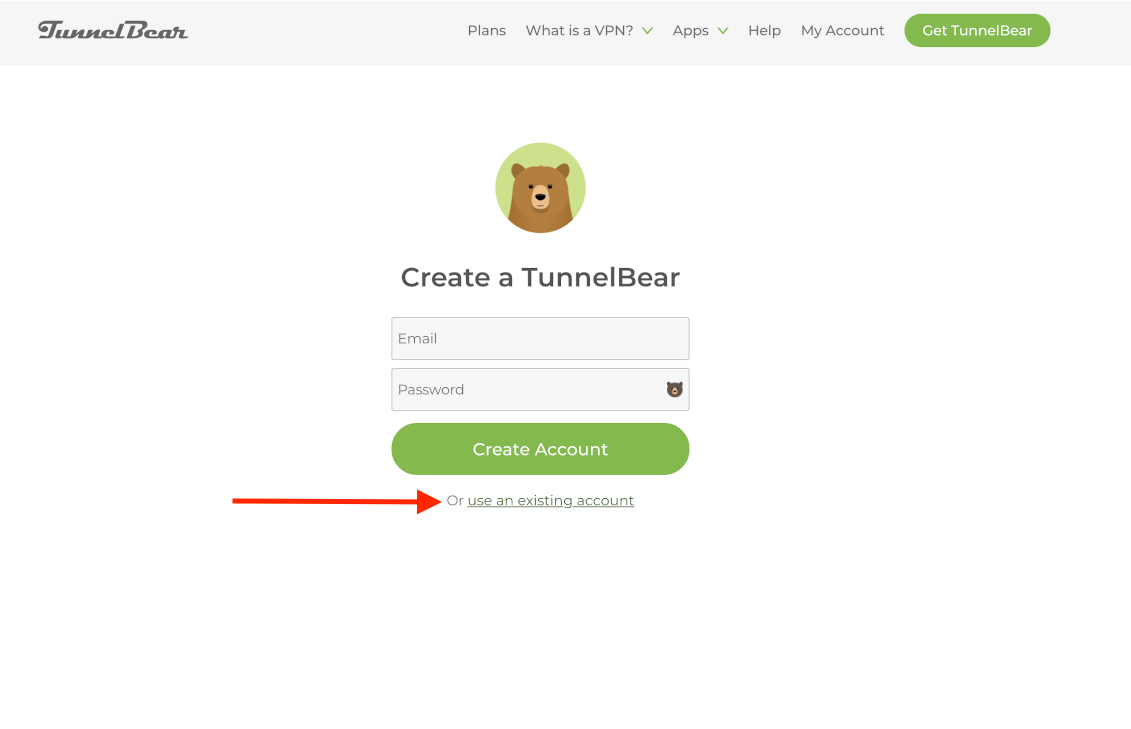
Click “Use an existing account” if you've already signed up.
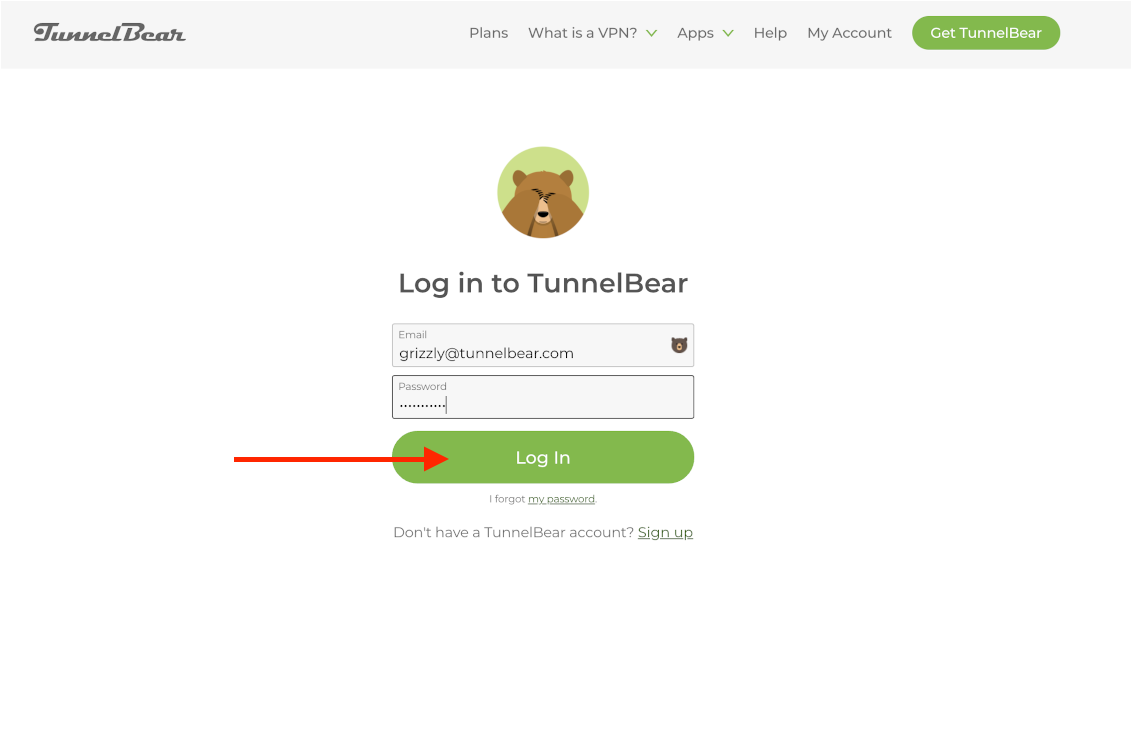
Enter the account email and password you used at signup.
Get Connected
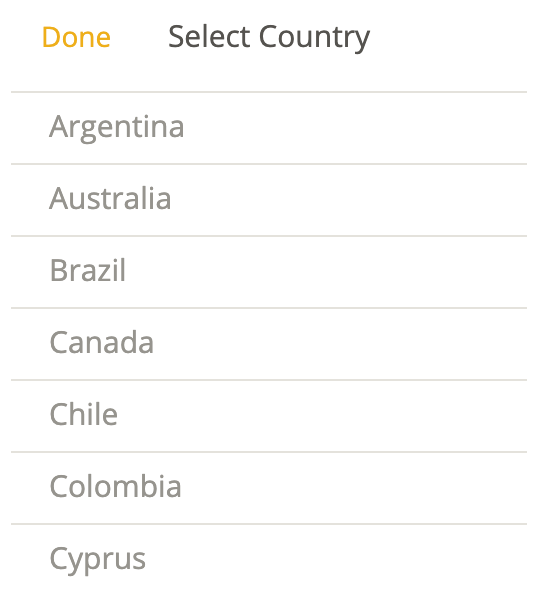
Click the arrow next to the tunnel name (in this example, "United States") to access the countries list.

Click the country you'd like to connect through.
Click the toggle switch into the ON position and you’re all set and ready to tunnel.

Your Bear is excited to help keep your internet connection secure, but if you have any questions about TunnelBear, our friendly Support Bears are always available.
Happy tunneling!
Visit/Rate Article -
Firefox Extension Setup Guide
In this guide, we’ll show you how to set up TunnelBear for your Firefox Browser. The TunnelBear extension will ensure that all traffic from your browser is kept private and secure.
Download the TunnelBear app
First, you'll have to download the TunnelBear extension from our website.
Visit our website https://www.tunnelbear.com/apps/browser, then click the Firefox button at the bottom of the page.

Click the ‘Add to Firefox’ button at the top right corner of the Firefox Web Store website.

Click on “Add” to grant permission for TunnelBear to add the extension.

Note: This is a standard warning from Firefox. TunnelBear will never make changes to your browser settings outside of those necessary to set up the VPN connection. For more information on why you can trust TunnelBear, visit this help article.
Once the extension is successfully installed, a prompt will appear confirming that “TunnelBear VPN has been added to Firefox''. Enable “Allow this extension to run in Private Windows” if required, and click on the blue “Okay, Got it” button.

Create a TunnelBear Account
Enter your email address and create a strong password, then click “Create Account” if you haven’t already signed up for TunnelBear.

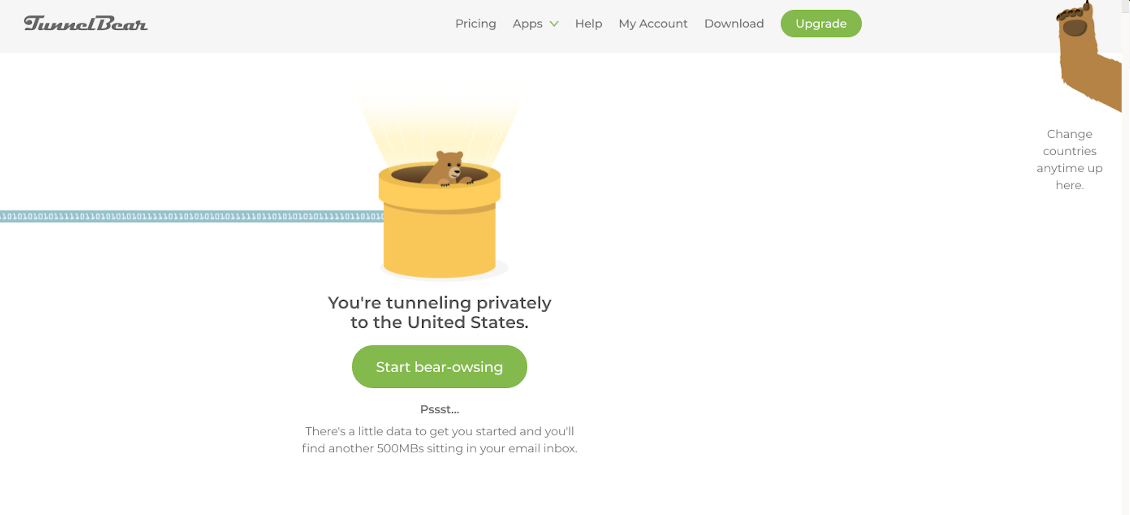
You will see a confirmation to start ‘Bear-owsing’, then skip to Get Connected.
Log In with an Existing Account
Click “Use an existing account” if you've already signed up.

Enter the account email and password you used at signup.

Get Connected
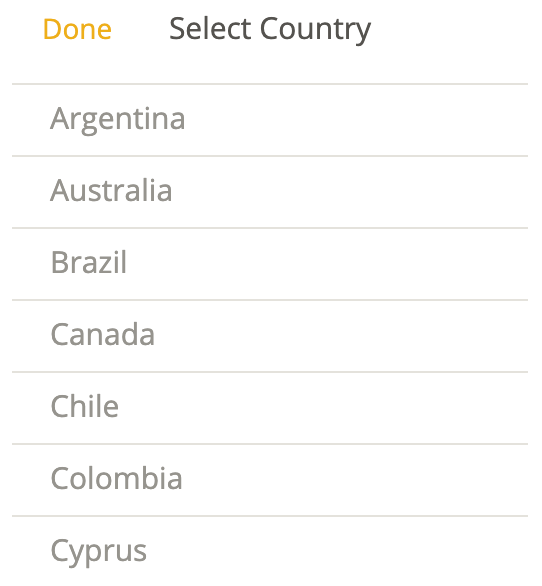
Click the arrow next to the tunnel name (in this example, "United States") to access the countries list.

Click the country you'd like to connect through.
Click the toggle switch into the ON position and you’re all set and ready to tunnel.

Your Bear is excited to help keep your internet connection secure, but if you have any questions about TunnelBear, our friendly Support Bears are always available.
Happy tunneling!
Visit/Rate Article
FAQ
-
What does TunnelBear do? What is a VPN?
TunnelBear is the world’s easiest to use VPN (Virtual Private Network) for both consumers and teams.
A VPN (Virtual Private Network) creates a private network for you to use by encrypting your connection, even when you're using a public network. To learn more about how VPN works, check out our handy guide.
TunnelBear works by allowing you to connect through an encrypted tunnel to locations around the world. When connected, your real IP address remains hidden and you're able to browse the web as though you're physically located in the country you're connected to.
TunnelBear can be used to protect you and your privacy, hide your real IP address, bypass internet censorship, and experience the internet as people in other countries experience it.
Visit/Rate Article -
How do I install TunnelBear?
To install TunnelBear on a macOS or Windows computer, head to our website to download the app. Then, follow the prompts to get your new Bear installed.
On iOS or Android devices, you can download and install TunnelBear from the respective app stores on your device. For iOS, you can download it here. For Android, grab the app here.
If you're using TunnelBear on iOS, there's one more step. You'll have to install a VPN profile. Don't worry, your Bear will handle the technical stuff. Simply attempt to connect by pressing the ON switch and follow the prompts to install the VPN profile.
If you're looking for a lighter version of TunnelBear, we have browser extensions available for Chrome, Firefox and Edge. You can download them from our website and add them to your browser. If you're already running the desktop app, you do not also need the browser extension.
If you run into any issues getting TunnelBear installed on your device, our friendly Support Bears can help out. Just get in touch.
Visit/Rate Article -
How do I use TunnelBear?
We've kept TunnelBear as simple to use as possible!
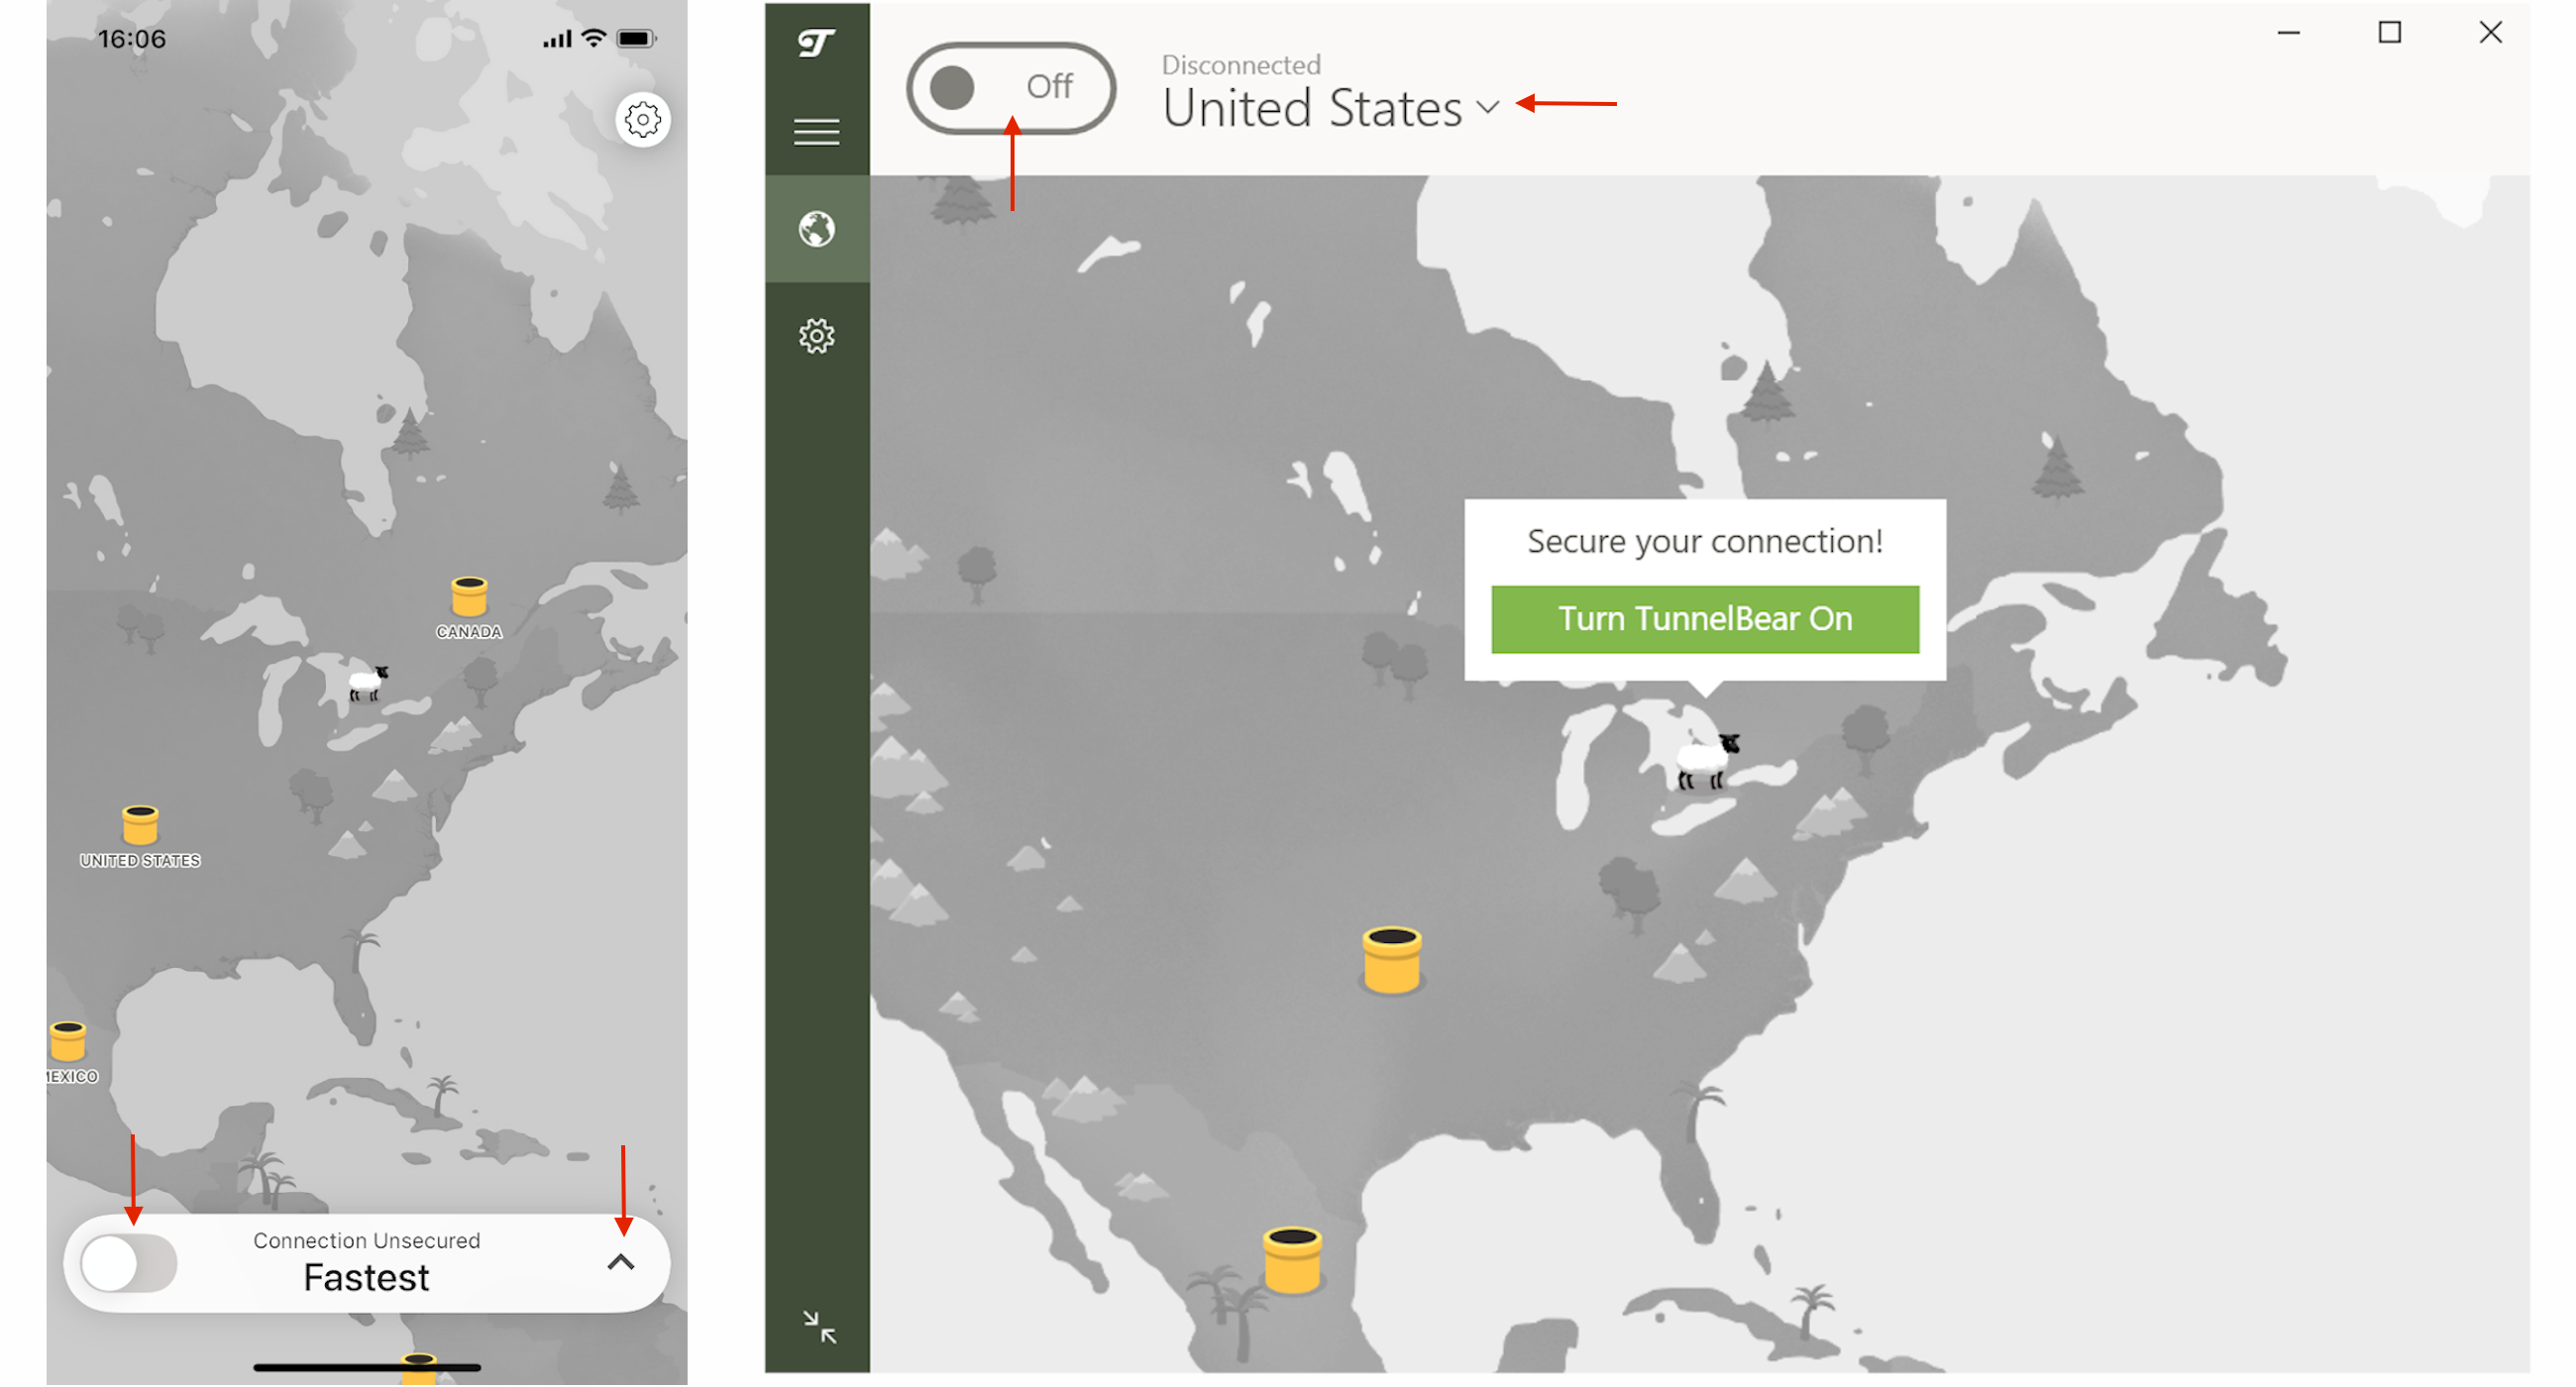
When you're logged into the TunnelBear app, you should see a toggle switch. This is your ON and OFF button. You should also see either Fastest, or a country name. Click this to expand the list of countries you can tunnel to.
iOS Windows
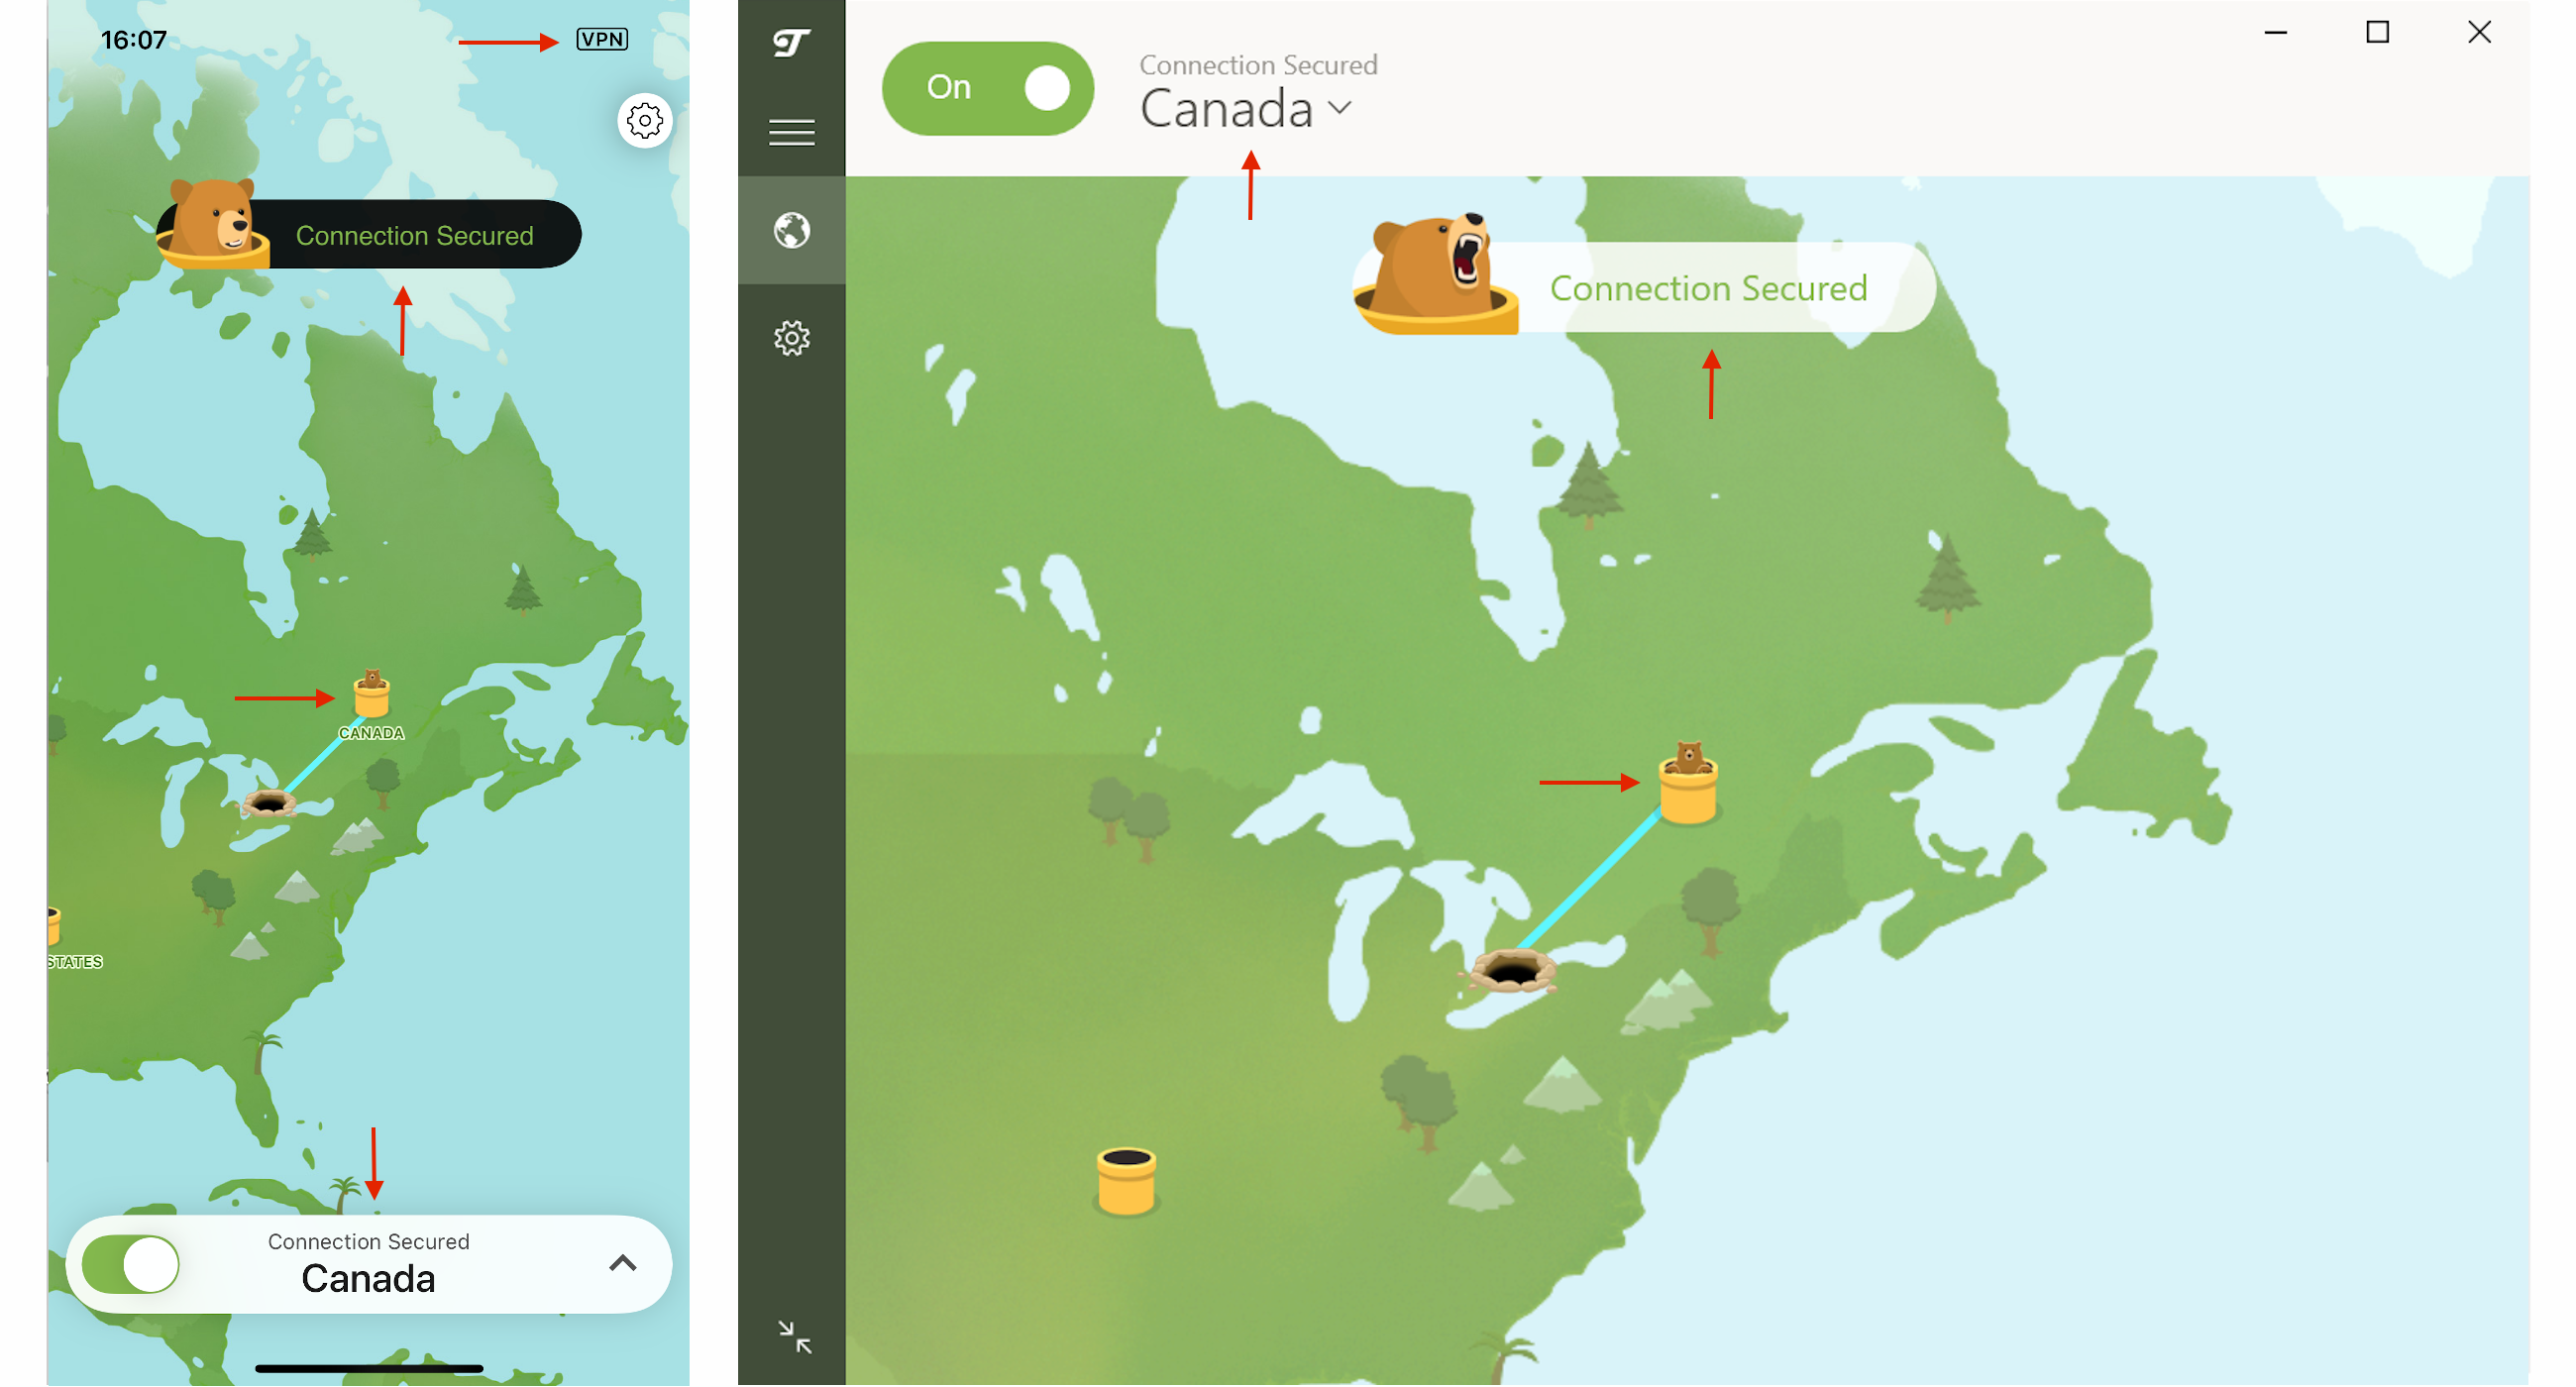
Once you've chosen the country you'd like to tunnel to, move the toggle switch to the ON position and watch your Bear dig a tunnel. You'll know you're connected when the map turns green and your Bear appears in the tunnel you've selected.
iOS Windows
That's it! You can continue browsing as you normally would knowing that your device traffic is being protected by a ferocious Bear!
If you'd ever like to confirm your connection, or see the IP address you're connected to, head to https://www.tunnelbear.com/whats-my-ip.
Visit/Rate Article -
How do I know TunnelBear is working?
There are a couple of ways to confirm that TunnelBear is working.
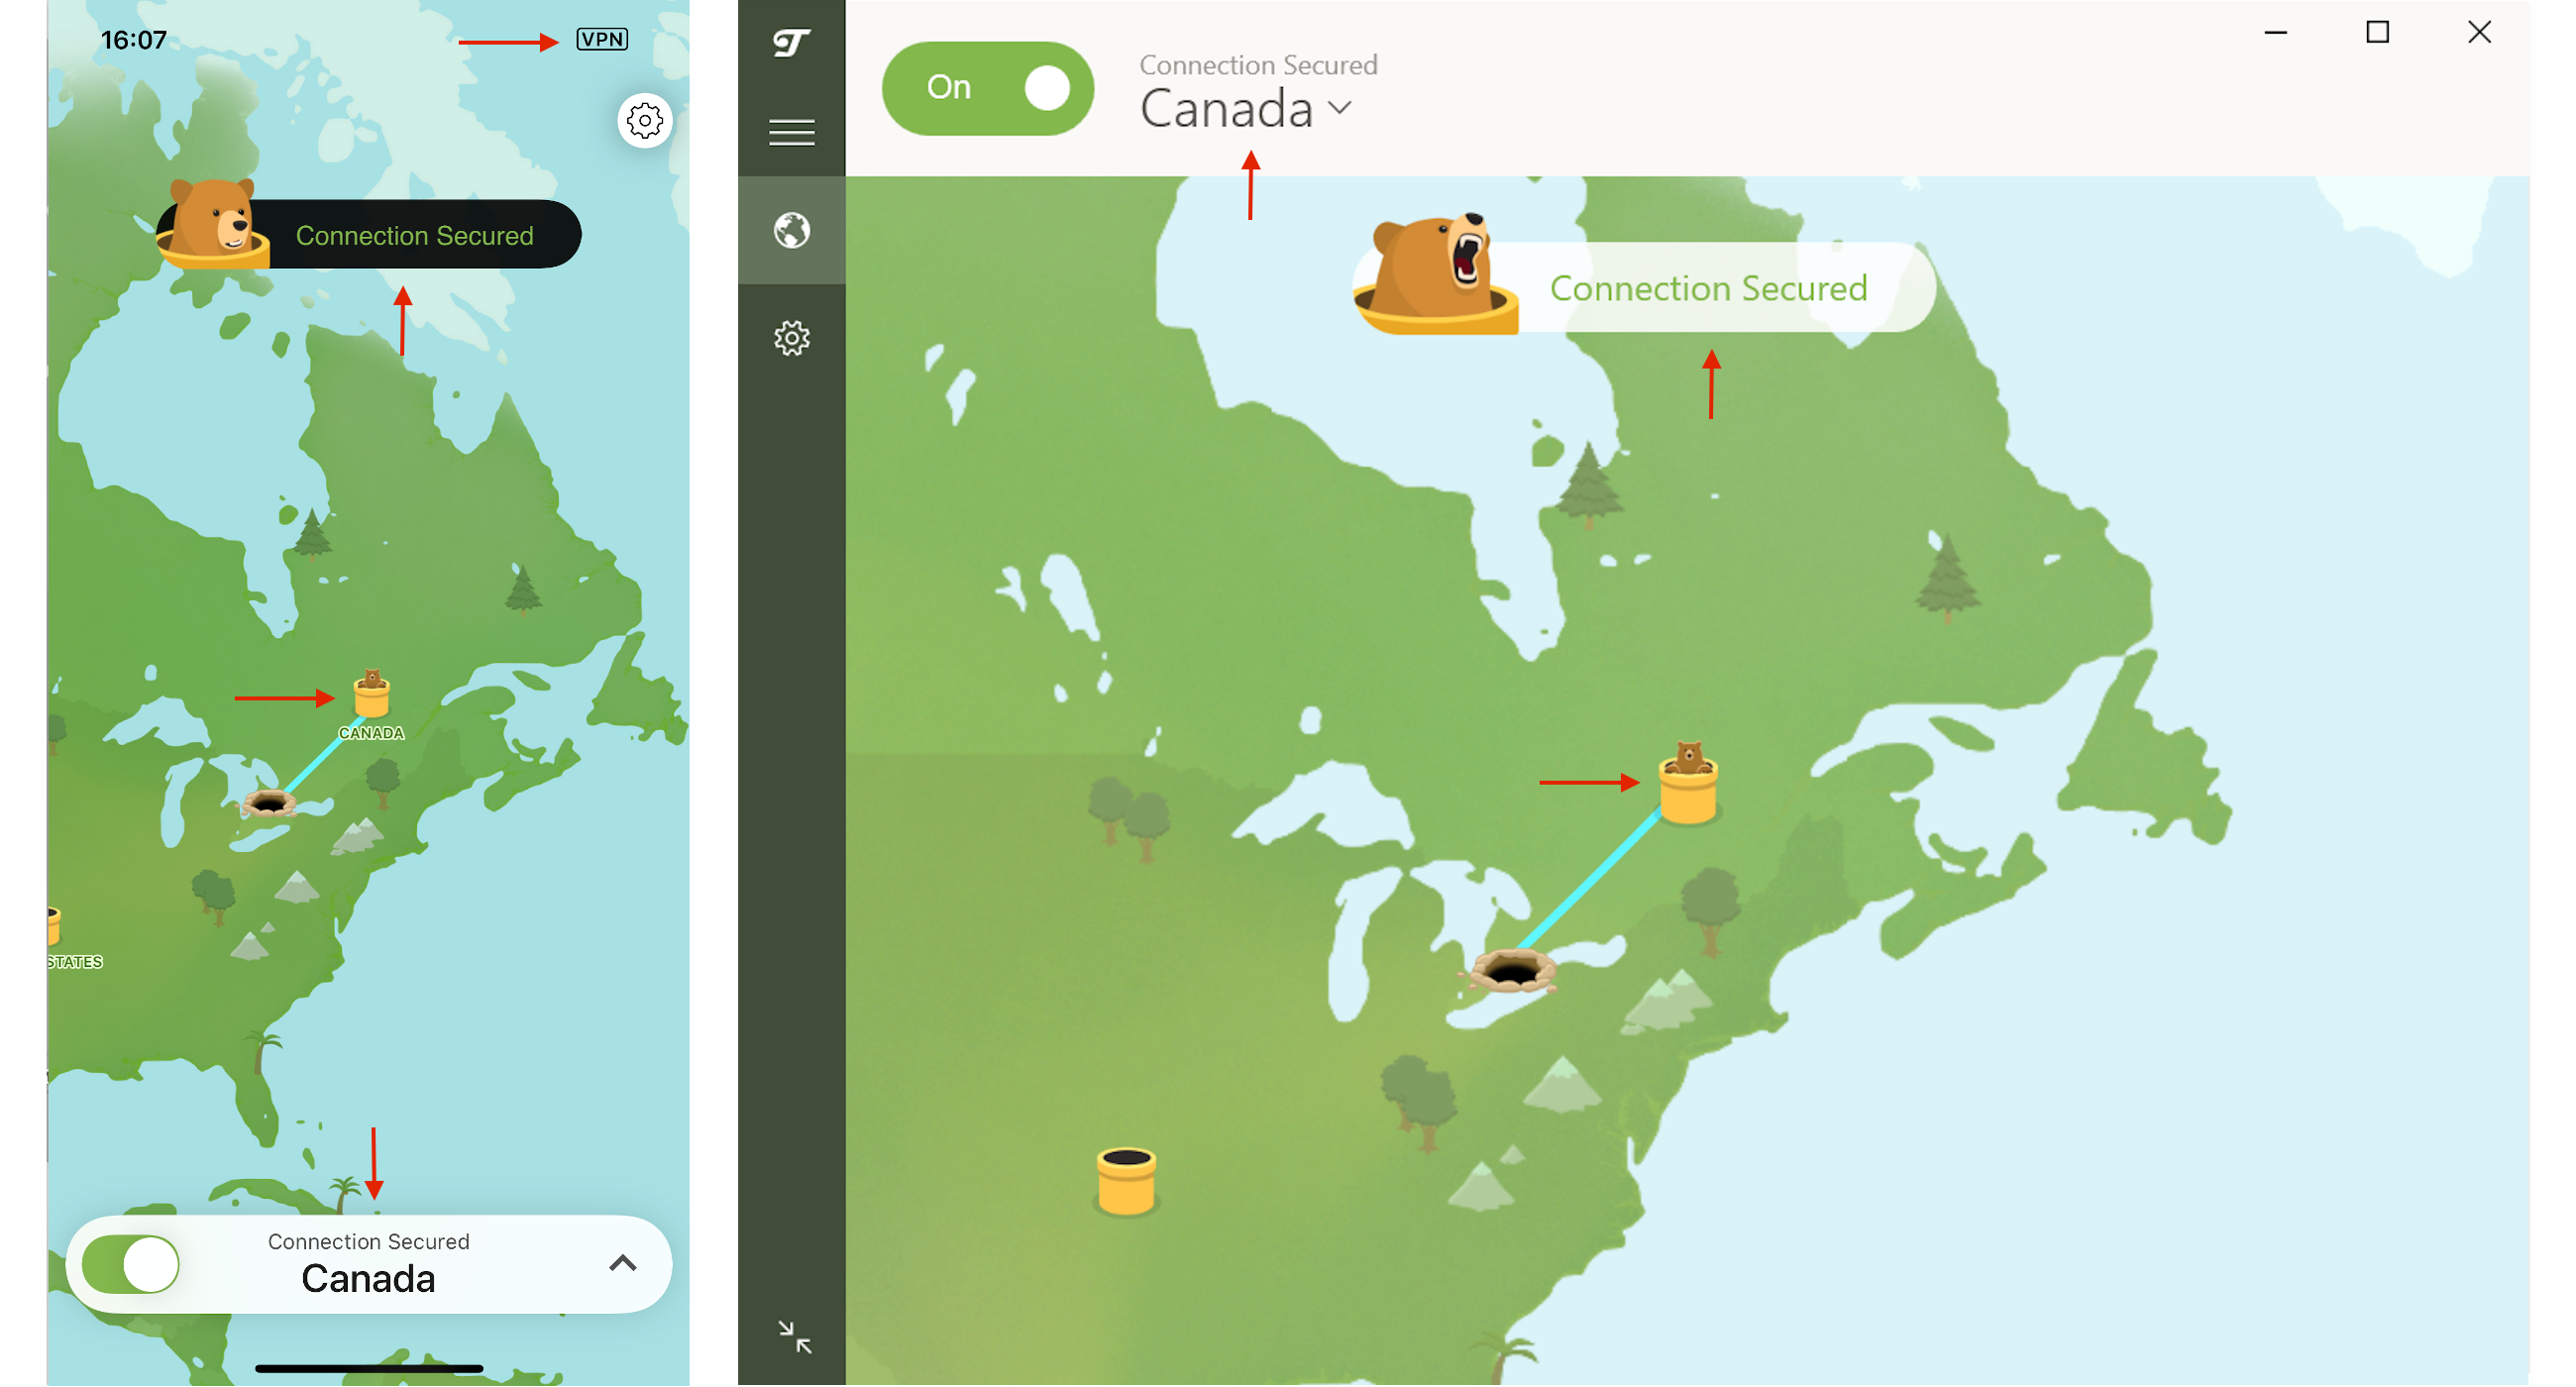
If you're using the TunnelBear app on macOS, Windows, iOS or Android, you'll know TunnelBear is connected and working when the map is green and your Bear is sitting happily in the tunnel you've chosen.
iOS Windows
If you're using the TunnelBear browser extension (for Chrome or Firefox) instead of the full app, the browser extensions will also have a green map and a Bear in the tunnel when connected. If you minimize the extension, you'll know you're connected when you see your Bear sitting in the tunnel icon.

Browser Extension (on Chrome)
If you'd like to confirm your connection, or see the IP address you're connected to, check out this website. If the tunnel displayed on the website matches the one you're connected to in TunnelBear, then you're good to go!
Visit/Rate Article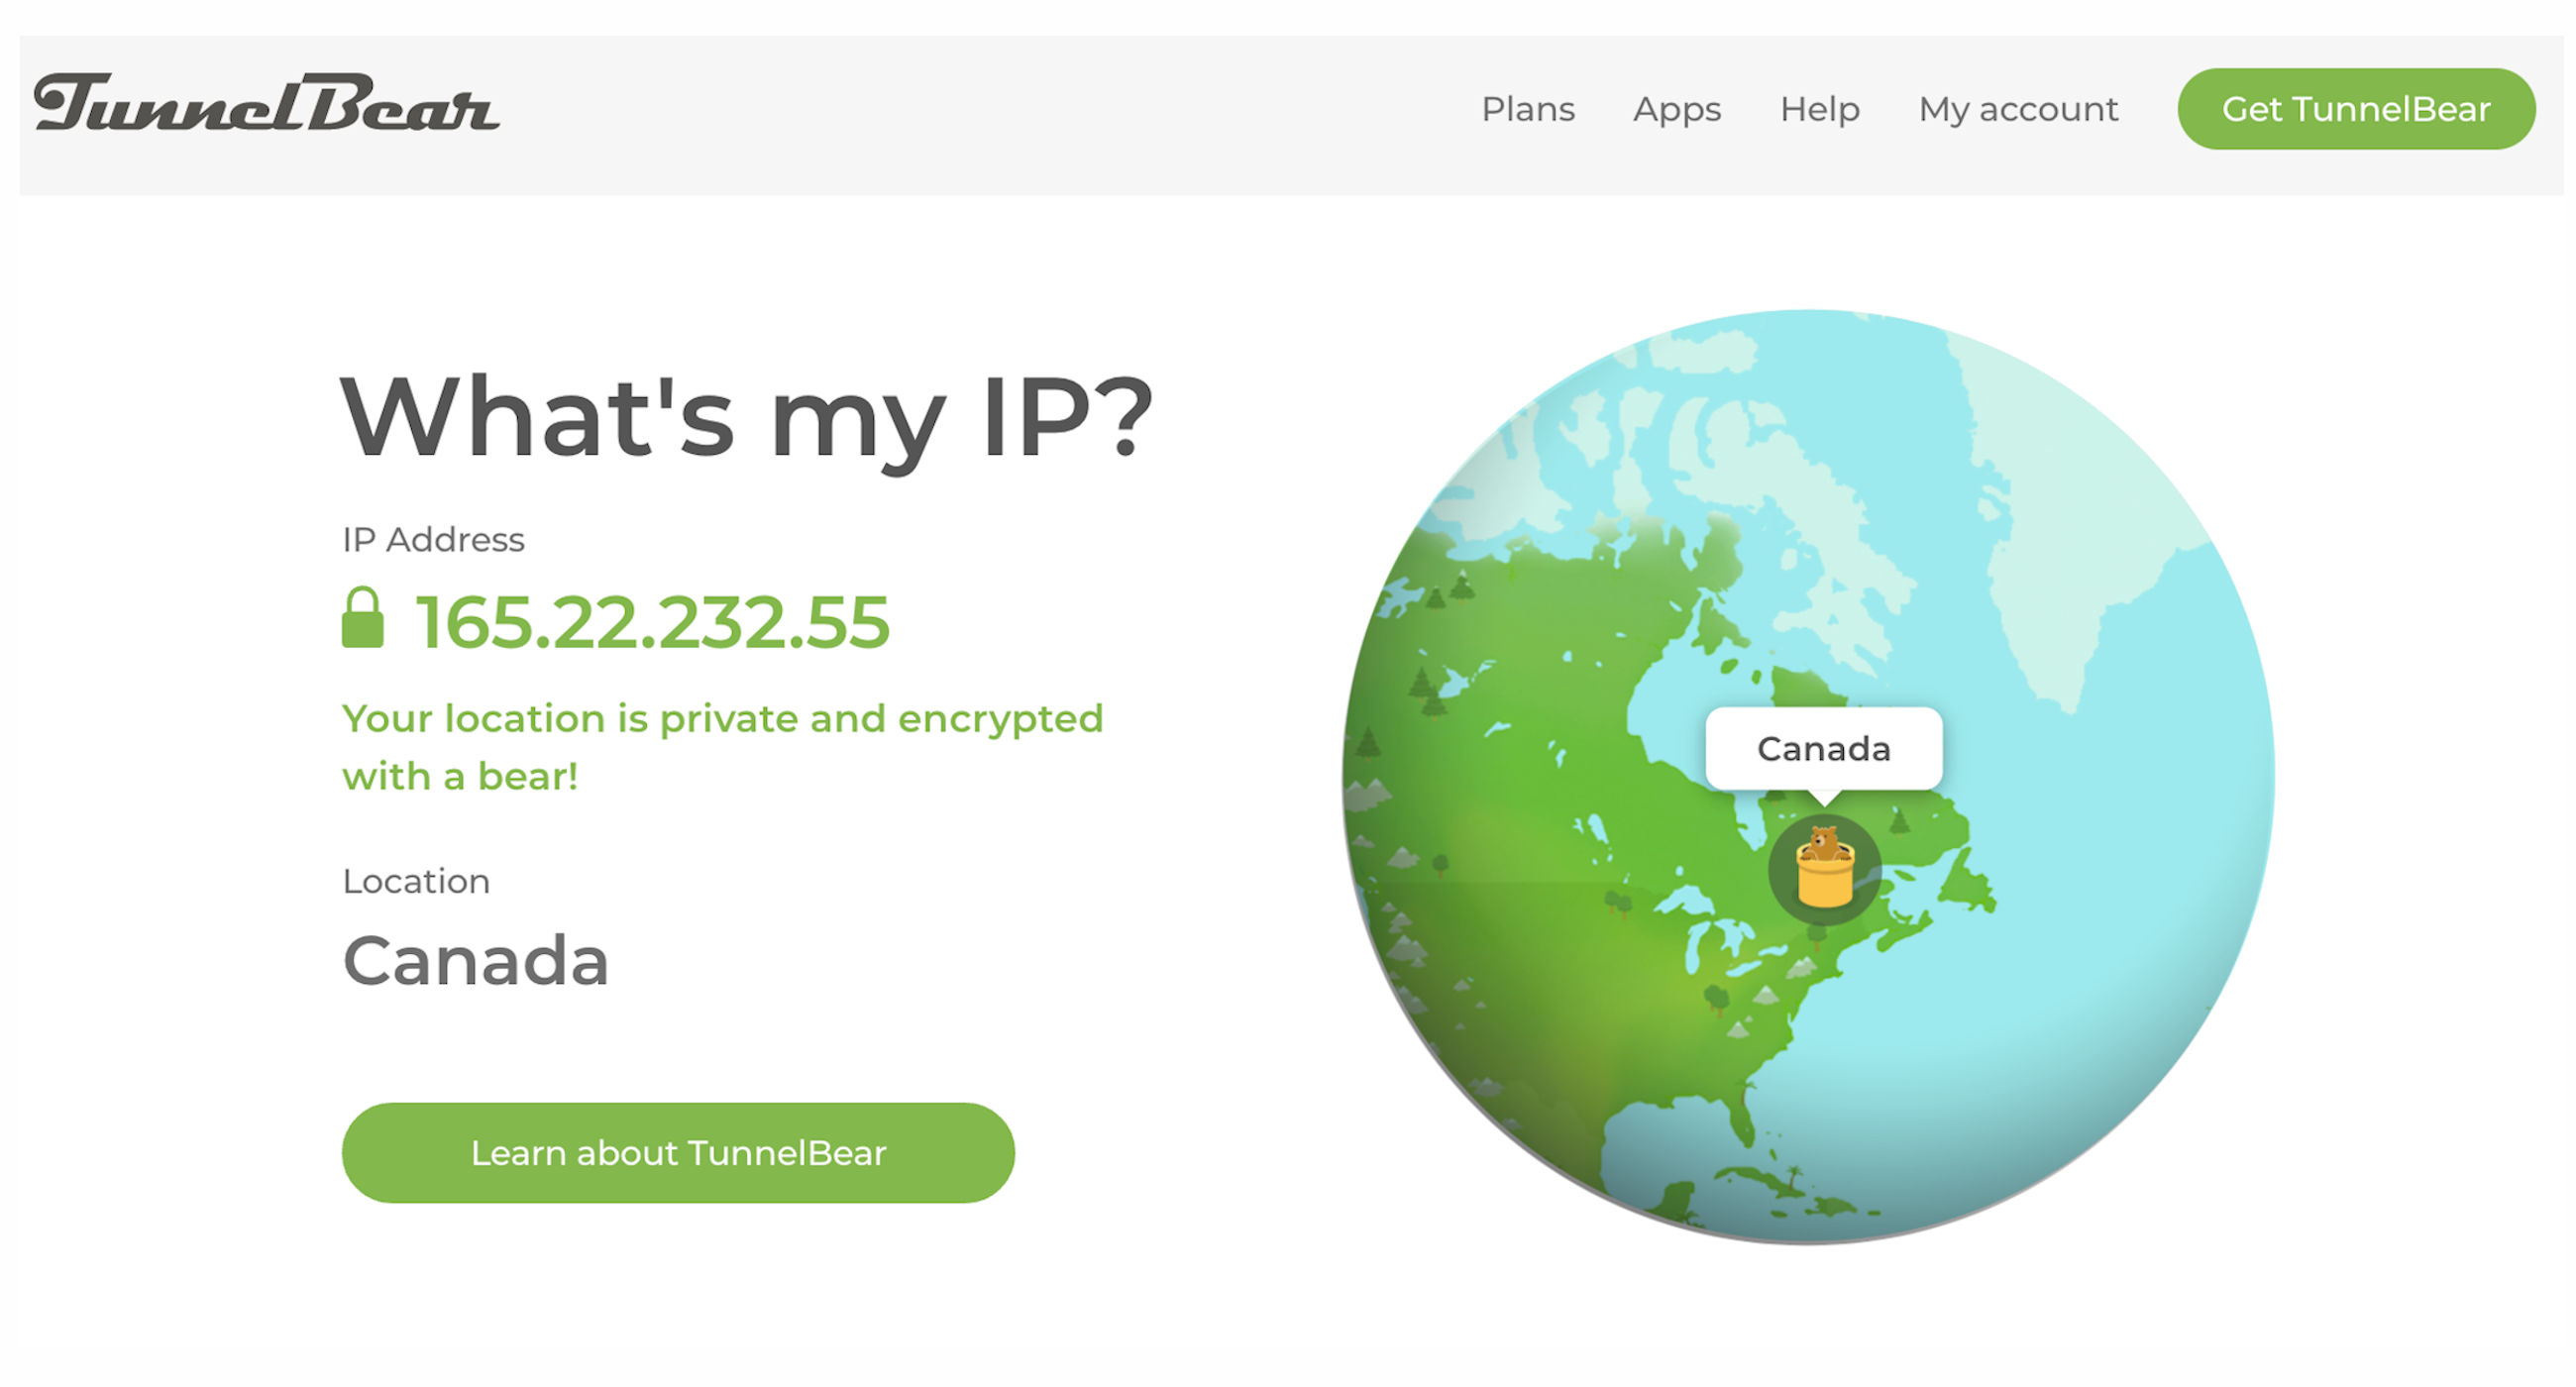
-
What devices will TunnelBear work on?
You can use TunnelBear to secure your internet connection on Windows, macOS, Android and iOS devices. We also have a browser extension for Chrome, Firefox, and Edge browsers. We do provide instructions for using TunnelBear on Linux, however, we only provide limited support for that platform. For more information on operating system versions required to start tunneling securely with your VPN, check out our downloads page.
TunnelBear is not supported for Kindle/eReaders, Windows mobile devices, Apple/Android TV, or gaming systems. TunnelBear does not provide configurations to be used on modems/routers.
Visit/Rate Article -
What operating systems (OS) does TunnelBear support?
The TunnelBear app is compatible with the following operating systems (or later):
- Windows 10
- MacOS 11 (Big Sur)
- iOS 12
- Android 8.1 (Oreo)
The TunnelBear browser extension requires the following browser versions (or later):
- Chrome 22+
- Firefox 58+
- Edge 111+
Privacy and Security
-
Why should I trust TunnelBear?
You can trust TunnelBear for a few reasons. The first is that we make 100% of our revenue from paid subscriptions. We do give a little bit of data away for free, but our hope is that you'll fall in love and give your Bear a forever home! Often, free VPN services will collect your personal/usage data and sell it to third parties in order to make money. TunnelBear will NEVER do this. TunnelBear has a fierce no-logging policy. At no point, and under no circumstances will TunnelBear log or sell your personal/usage data.
Visit/Rate Article
In addition to our no-logging commitment, we also have a great privacy policy. Unlike many other VPN's, our privacy policy outlines how we run a trustworthy, free and paid VPN service by collecting the minimum amount of information possible necessary to provide you with a reliable service on our secure private network. We don’t require your name, we offer anonymous payment services, we don't collect your IP address and we avoid collecting other personal information via our analytics tools, all of which allow you to have more control over your personal information.
Finally, all of our applications are third party independently code audited each year to ensure they are consistently in line with the highest standards of security. We’re actually so confident we’re doing everything we can to protect you that we have published our latest results here. -
Does TunnelBear keep logs?
No! TunnelBear does not keep logs. This means we do not collect any information regarding what you 'bear'owse while connected to our secure and private VPN.
See our Privacy Policy and Terms of Service for a detailed breakdown of how we go above and beyond to protect your privacy. You can also take a look at our blog for even more information on how we secure and encrypt your internet connection with our strong VPN. There, you'll also find our Security Yearly Audits.
Of course, if you have any more questions or run into any issues, please reach out to our support bears here.
Visit/Rate Article -
What kind of encryption does TunnelBear use?
TunnelBear is a strong and private VPN built using a variety of secure and reliable encryption protocols. See here for up-to-date information on our encryption and security. You can also check out our blog for up to date Security Audits and other interesting content.
Visit/Rate Article -
Does TunnelBear protect against DNS leaks?
Yes. A DNS leak is a privacy and anonymity threat that can allow your ISP to see and monitor your online activity even when you have a VPN tunnel established.
Visit/Rate Article
The TunnelBear's secure VPN service automatically ensures that all traffic from your computer, including DNS, is sent through the VPN tunnel as soon as it is established. Our servers handle all DNS requests. There are no additional steps required to “enable” DNS leak protection - you're already secure when you connect to our encrypted tunnels.
When you connect to TunnelBear and go on dnsleaktest.com (or a similar service/website), you'll only see one IP address reported back to you in the results. This IP address should match the IP address of the VPN server you're currently connected to. To make sure, head over to our website and compare the results shown there with that of the DNS leak test. If the IPs match, then your DNS is not leaking.
Also, take a look at our blog post which goes into more detail about DNS and how TunnelBear handles it!
Features
-
2FA: Secure your account with Two-Factor Authentication
Two-Factor Authentication (2FA) allows you to further secure your account by setting up an additional verification step when logging in. This helps further ensure that you (and only you) are able to access your TunnelBear account.
- Protect your account from unauthorized access
- Secure your data from prying eyes
- No extra cost to enable
- Keep your Bear safe from hackers
2FA for TunnelBear
Two-Factor Authentication is available for all platforms (Windows, macOS, iOS, Android) and the TunnelBear website. When you turn on 2FA, it will be enabled for all TunnelBear apps across your entire account.
TunnelBear currently supports app authentication and email authentication as options when you choose to enable Two-Factor Authentication.
App authentication
Use third-party authenticator apps to provide you with a unique code each time you log in to TunnelBear. Some common authenticator apps available are Google Authenticator, Authy, Duo, and more. Many dedicated password manager apps also include their own app authenticator functionality.
Using app authentication also allows you to download and store backup codes. These codes can be used to help you get logged in should you ever lose access to your device or authenticator app. It is highly recommended you generate backup codes and store them somewhere secure.
Email authentication
Email authentication allows you to send a one-time authentication code directly to your email address on file, whenever you try to log in. While not as secure as using an authenticator app, email authentication is a much simpler method for turning on 2FA.
Enabling 2FA for TunnelBear
Turning on Two-Factor Authentication for TunnelBear is extremely easy. You can do this from your account on our website, or directly from the TunnelBear application. Regardless of where you choose to enable 2FA, the process will be the same, depending on the type of authentication you select.
Enabling app authentication
- Locate the Two-Factor Authentication feature:
- Mobile: Open your app settings and scroll down until you see Two-Factor Authentication.
- Desktop: Open your app settings and select the General tab.
- Web: Sign-in to your TunnelBear account online, and then select My Account > Security.
- When you enable 2FA, you will be prompted to enter your TunnelBear account password.
- You will then be provided with an option to select "App" or "Email" authentication. Select "App authentication".
- You will receive a QR and numerical code, both of which can be entered into your authenticator app of choice
- Your authenticator app will then provide you with a 6 digit code, which you will be prompted to enter into TunnelBear.
Enabling email authentication
- Locate the Two-Factor Authentication feature:
- Mobile: Open your app settings and scroll down until you see Two-Factor Authentication.
- Desktop: Open your app settings and select the General tab.
- Web: Sign-in to your TunnelBear account online, and then select My Account > Security.
- When you enable 2FA, you will be prompted to enter your TunnelBear account password.
- You will then be provided with an option to select "App" or "Email" authentication. Select "Email authentication".
- We will send an email containing a unique code to the email address associated with your TunnelBear account.
- You will then be prompted to enter that code directly into the TunnelBear.
That's it! 2FA should now be enabled for your account, using app authentication. Moving forward, you will need to enter the code sent to your email address or authenticator app when logging into TunnelBear on a new device.
If you run into issues with accessing your account after enabling 2FA, please make sure to contact our friendly support bears for help.
Visit/Rate Article -
Fastest Tunnel: Have the quickest connection possible
Fastest Tunnel determines which tunnel is best for you by connecting you to the location that is closest to you. This means that your data travels the shortest distance possible, ensuring that you get the best possible speed results. This feature is available on Windows, macOS, Android, and iOS devices. To use this feature, select 'Fastest' from the drop down list of countries.

iOS Windows
Visit/Rate Article -
TCP Override: Triumph over choppy or unstable connections
TCP Override is an advanced setting available on our macOS and Windows desktop apps. It forces TunnelBear to use a slightly slower, but more reliable tunneling protocol (TCP instead of UDP). Using TCP Override should result in better performance on an unreliable connection.
When to use TCP Override
Does your connection appear ‘broken’ a few minutes after enabling TunnelBear, or is streaming slow and choppy? It may be that your ISP (internet service provider) is throttling or even blocking UDP traffic. Or, it could be that your ISP might be experiencing some technical difficulties. In either case, TCP Override can potentially help!
Troubleshooting issues with TCP Override
If you find that TCP Override decreases the performance of your Bear, then it’s likely that you don’t need it. In this case, we recommend that you disable the feature. We also advise that you check out the following help articles if you are having a connection issue, or if your are having any speed issues.
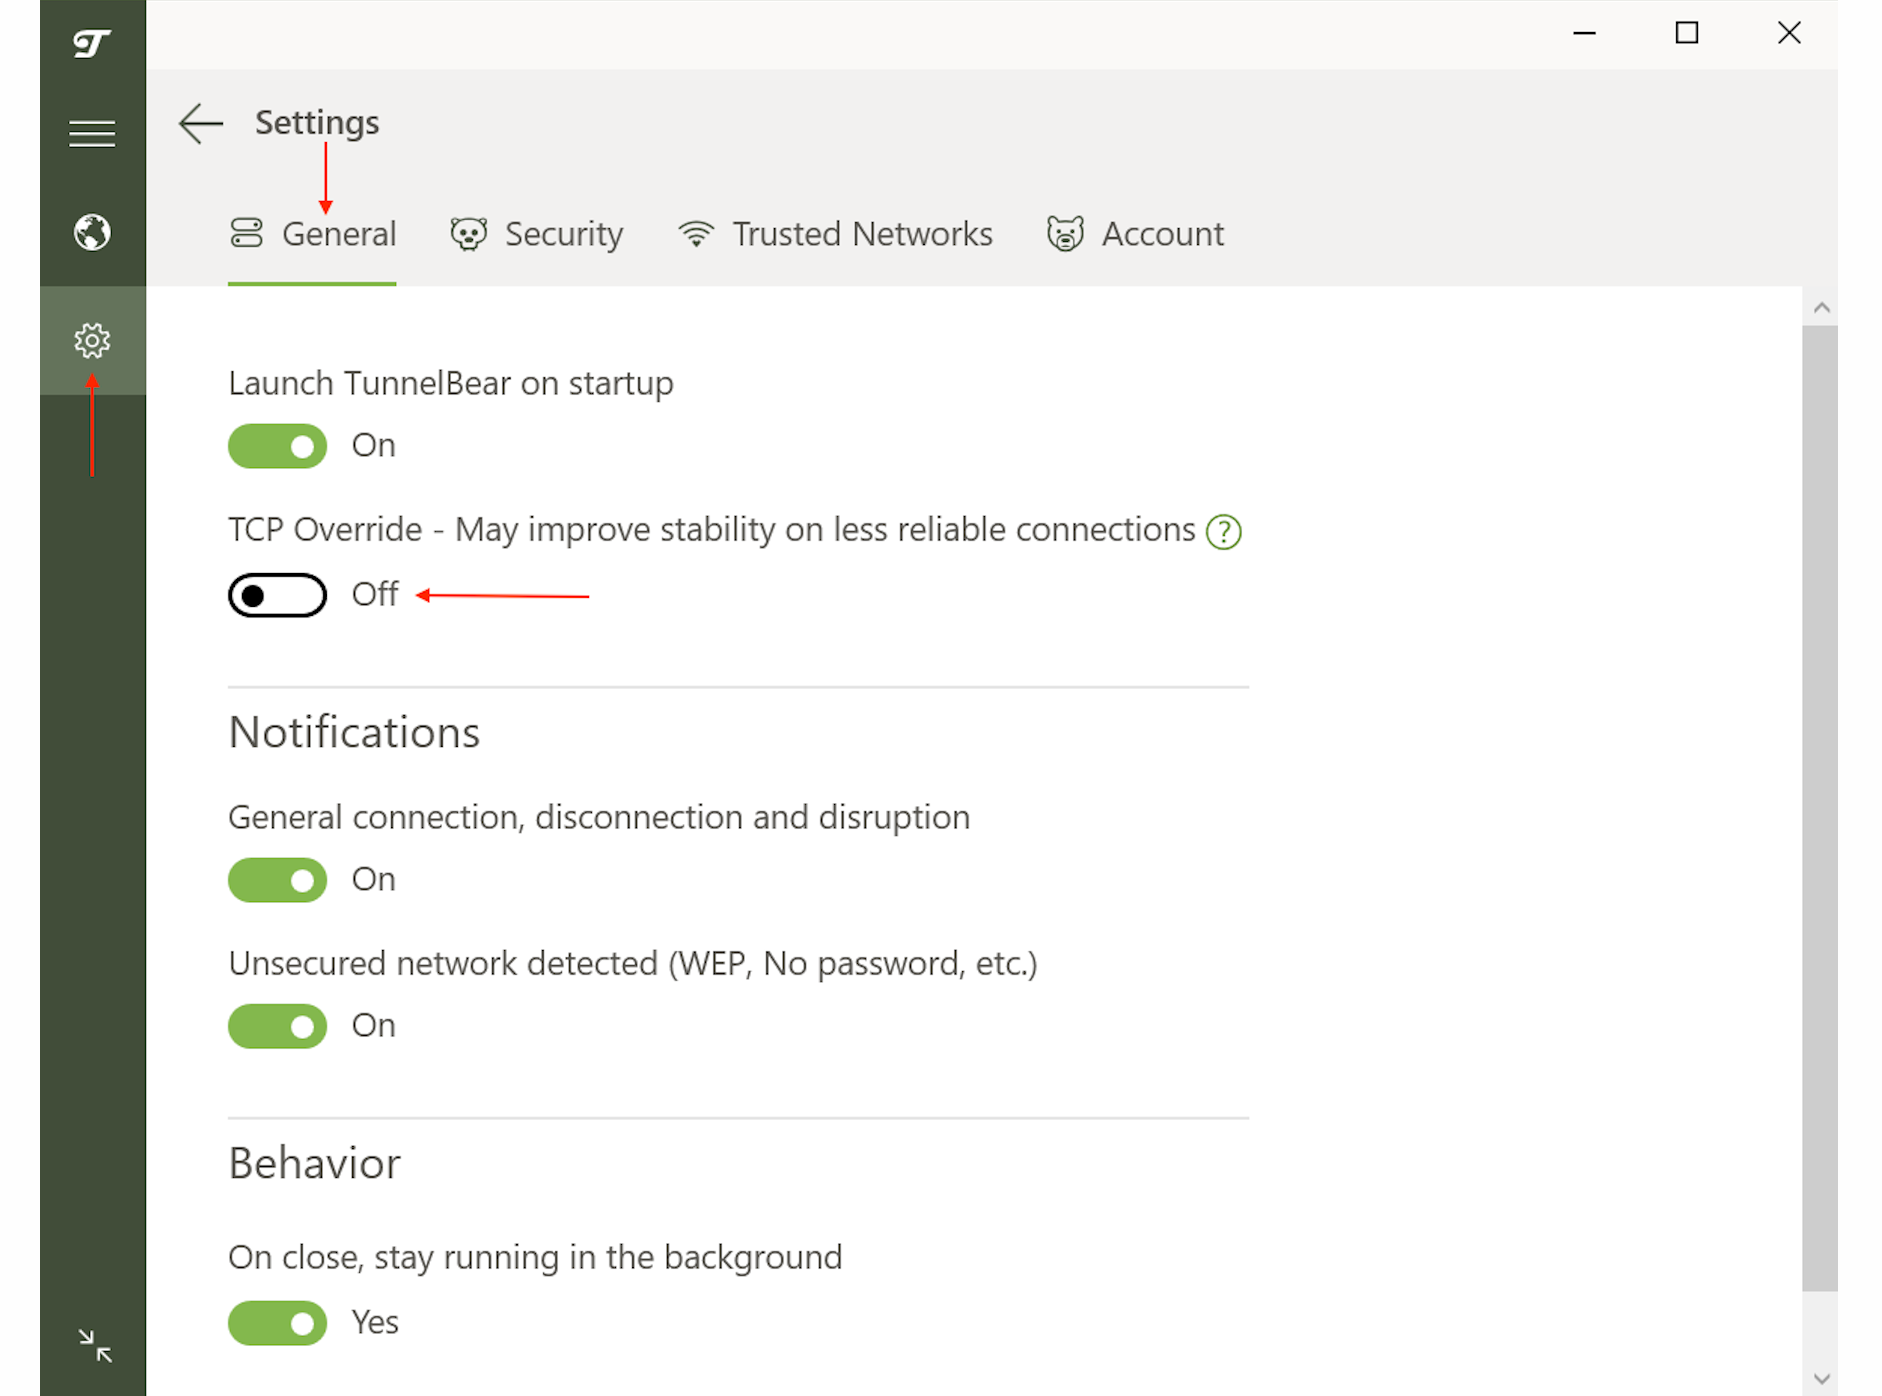
Enabling TCP Override on Windows
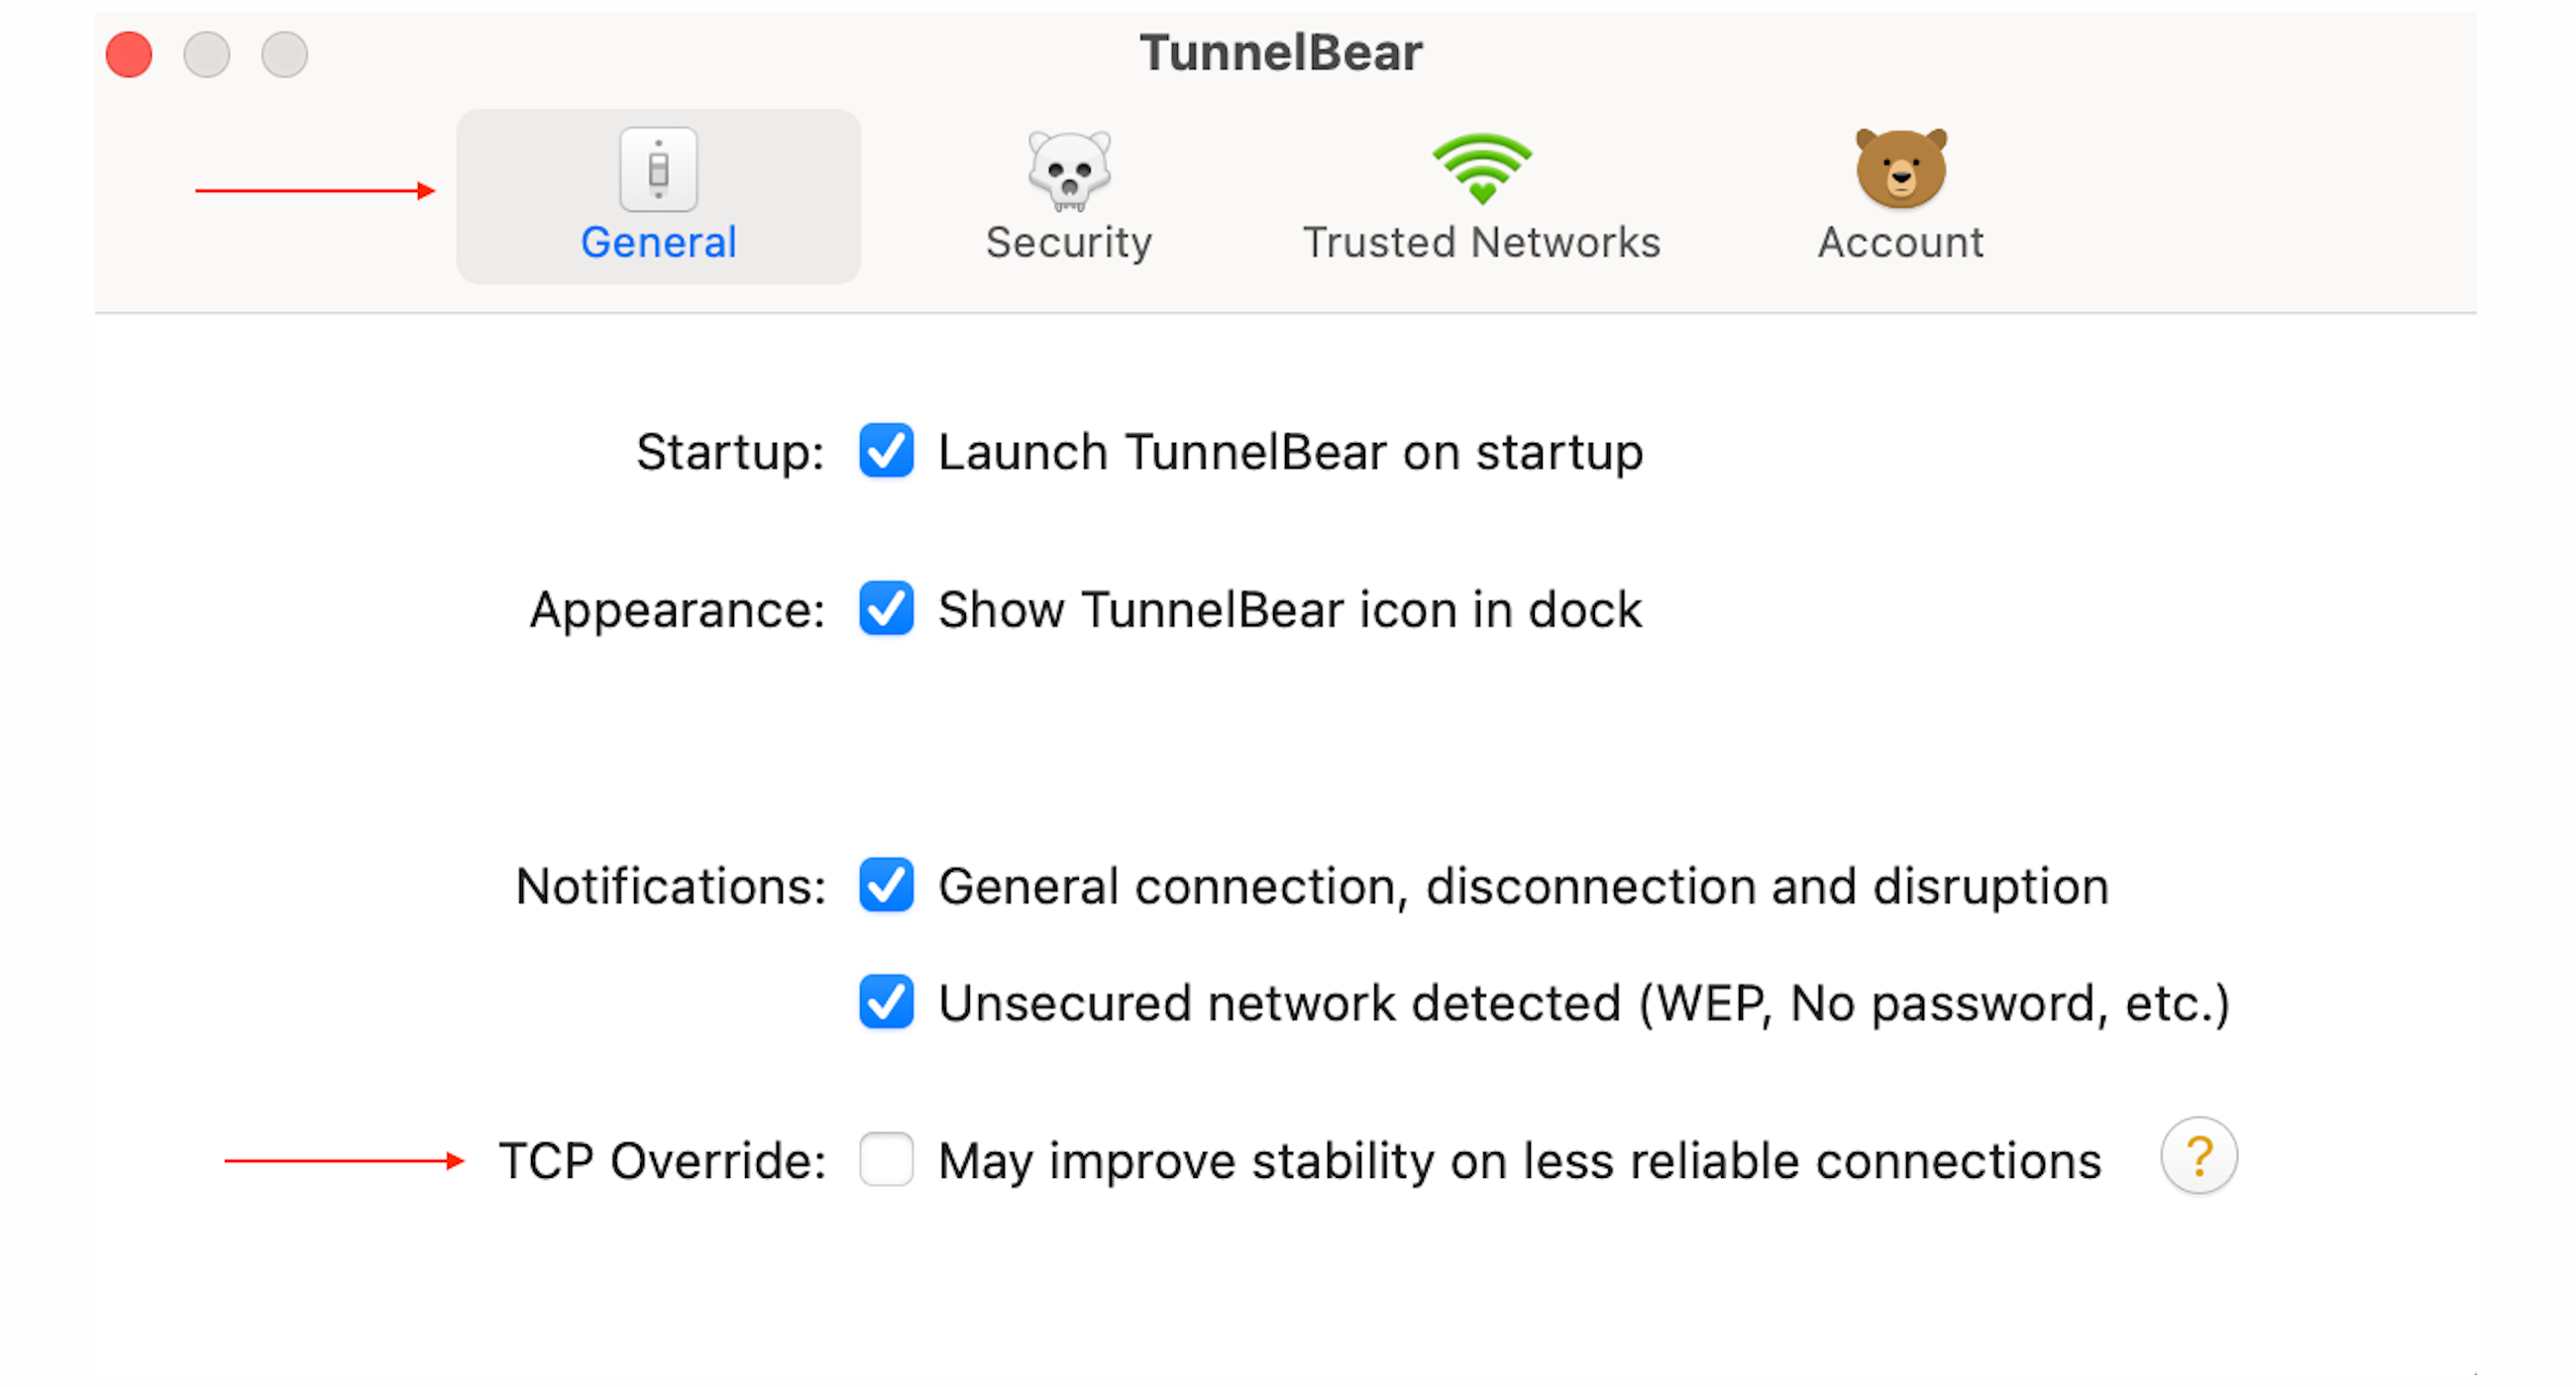
Enabling TCP Override on MacOS
Visit/Rate Article -
VigilantBear: Strengthen privacy when connecting
VigilantBear is designed to keep your location and data private in the brief seconds while TunnelBear is reconnecting. If TunnelBear loses connection for some reason (ie: you move between WiFi networks, or you’re out of network range briefly), it’s designed to automatically reconnect as soon as it detects the internet again. VigilantBear protects you in these brief seconds while TunnelBear is reconnecting.
The VigilantBear feature is available on Windows, macOS, iOS, and Android. For more details on how to use the VigilantBear feature, see our blog post.
Troubleshooting issues with VigilantBear
You won't be able to enable VigilantBear if your computer is running a custom proxy. Sometimes software similar to TunnelBear can be responsible for making these types of changes. Please ensure that all other third party security apps or VPN services are disabled before trying again.
IMPORTANT: On some networks, a custom proxy may be required to access the internet (without TunnelBear), so please check with your network administrator or ISP before disabling or changing any custom proxy settings if you’re not sure where they came from!
Windows
MacOS
Visit/Rate Article -
GhostBear: Fight censorship on restrictive networks
GhostBear makes your encrypted data less detectable to governments, businesses, and ISPs. It does this by making VPN traffic less detectable on your network, making it harder to block. GhostBear is currently available on our Windows, macOS (v4), and Android apps. GhostBear is not currently available for iOS or macOS (v5).
When to use GhostBearIf you’re already able to connect to TunnelBear without enabling GhostBear, you should NOT enable GhostBear. Using GhostBear when it's not needed can make your connection slower or cause it to not work at all. Leaving GhostBear off doesn’t make you less secure. You’ll still be protected by the latest and greatest encryption technologies.
If you’re not able to connect to TunnelBear or find that your bear can’t maintain a connection normally, we recommend that you try enabling GhostBear. If you don't notice any improvement, please make sure to turn GhostBear back off before reaching out to our friendly Support Bears.
How to enable GhostBearIf you're using GhostBear on Windows or macOS, enter your TunnelBear preferences by selecting the Gear icon within the app (located on the left side of the app for Windows, and the top right corner for Mac). Select "Settings" and then check off GhostBear.
If you want to use GhostBear on Android, click on the "Menu" icon in the top left corner (the three horizontal stripes). Then select "Options" and check off the GhostBear box.
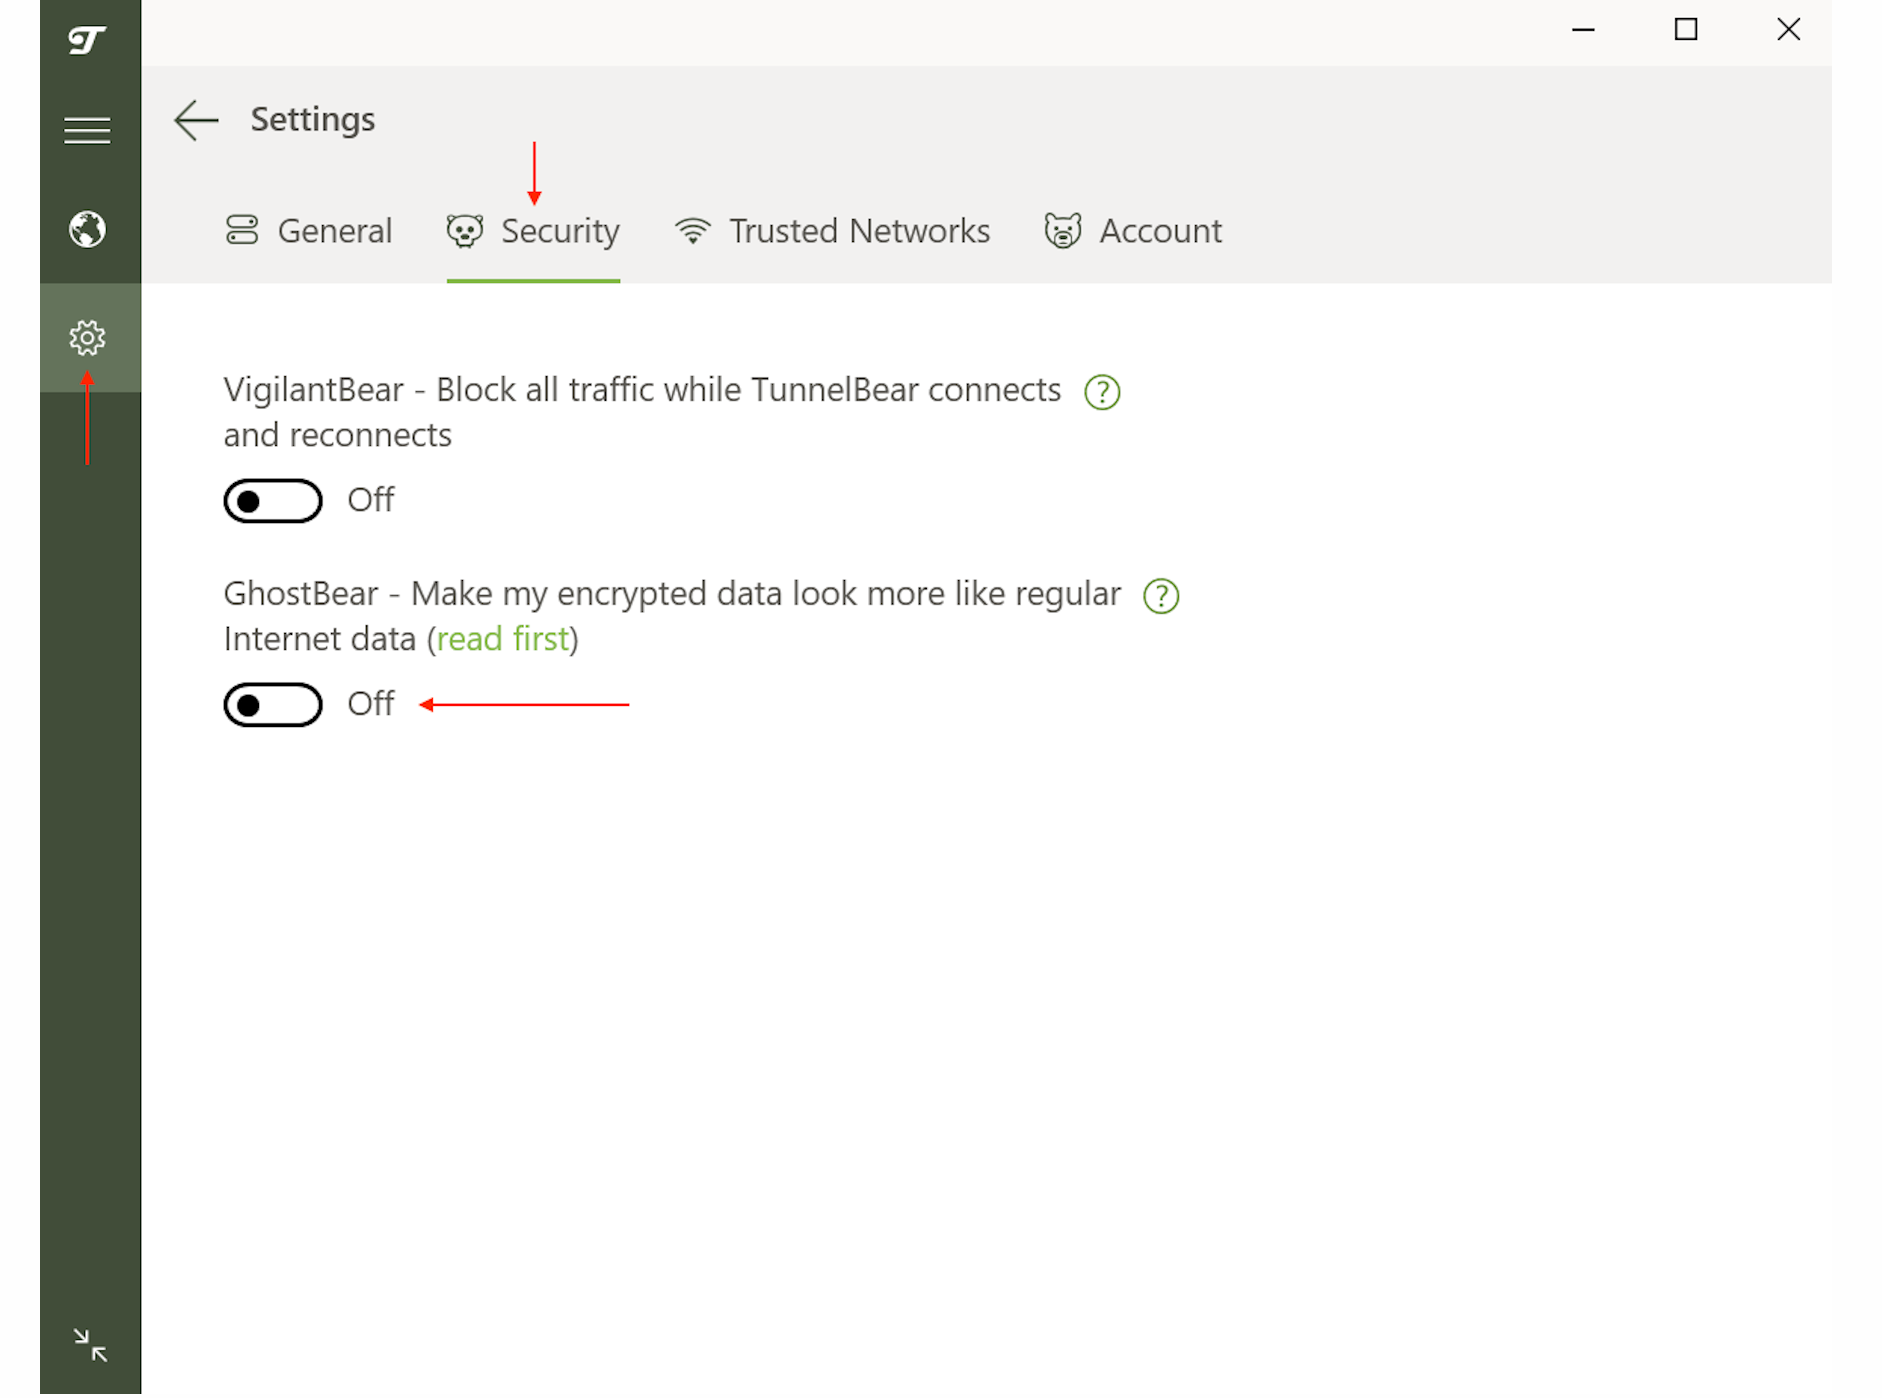
Windows
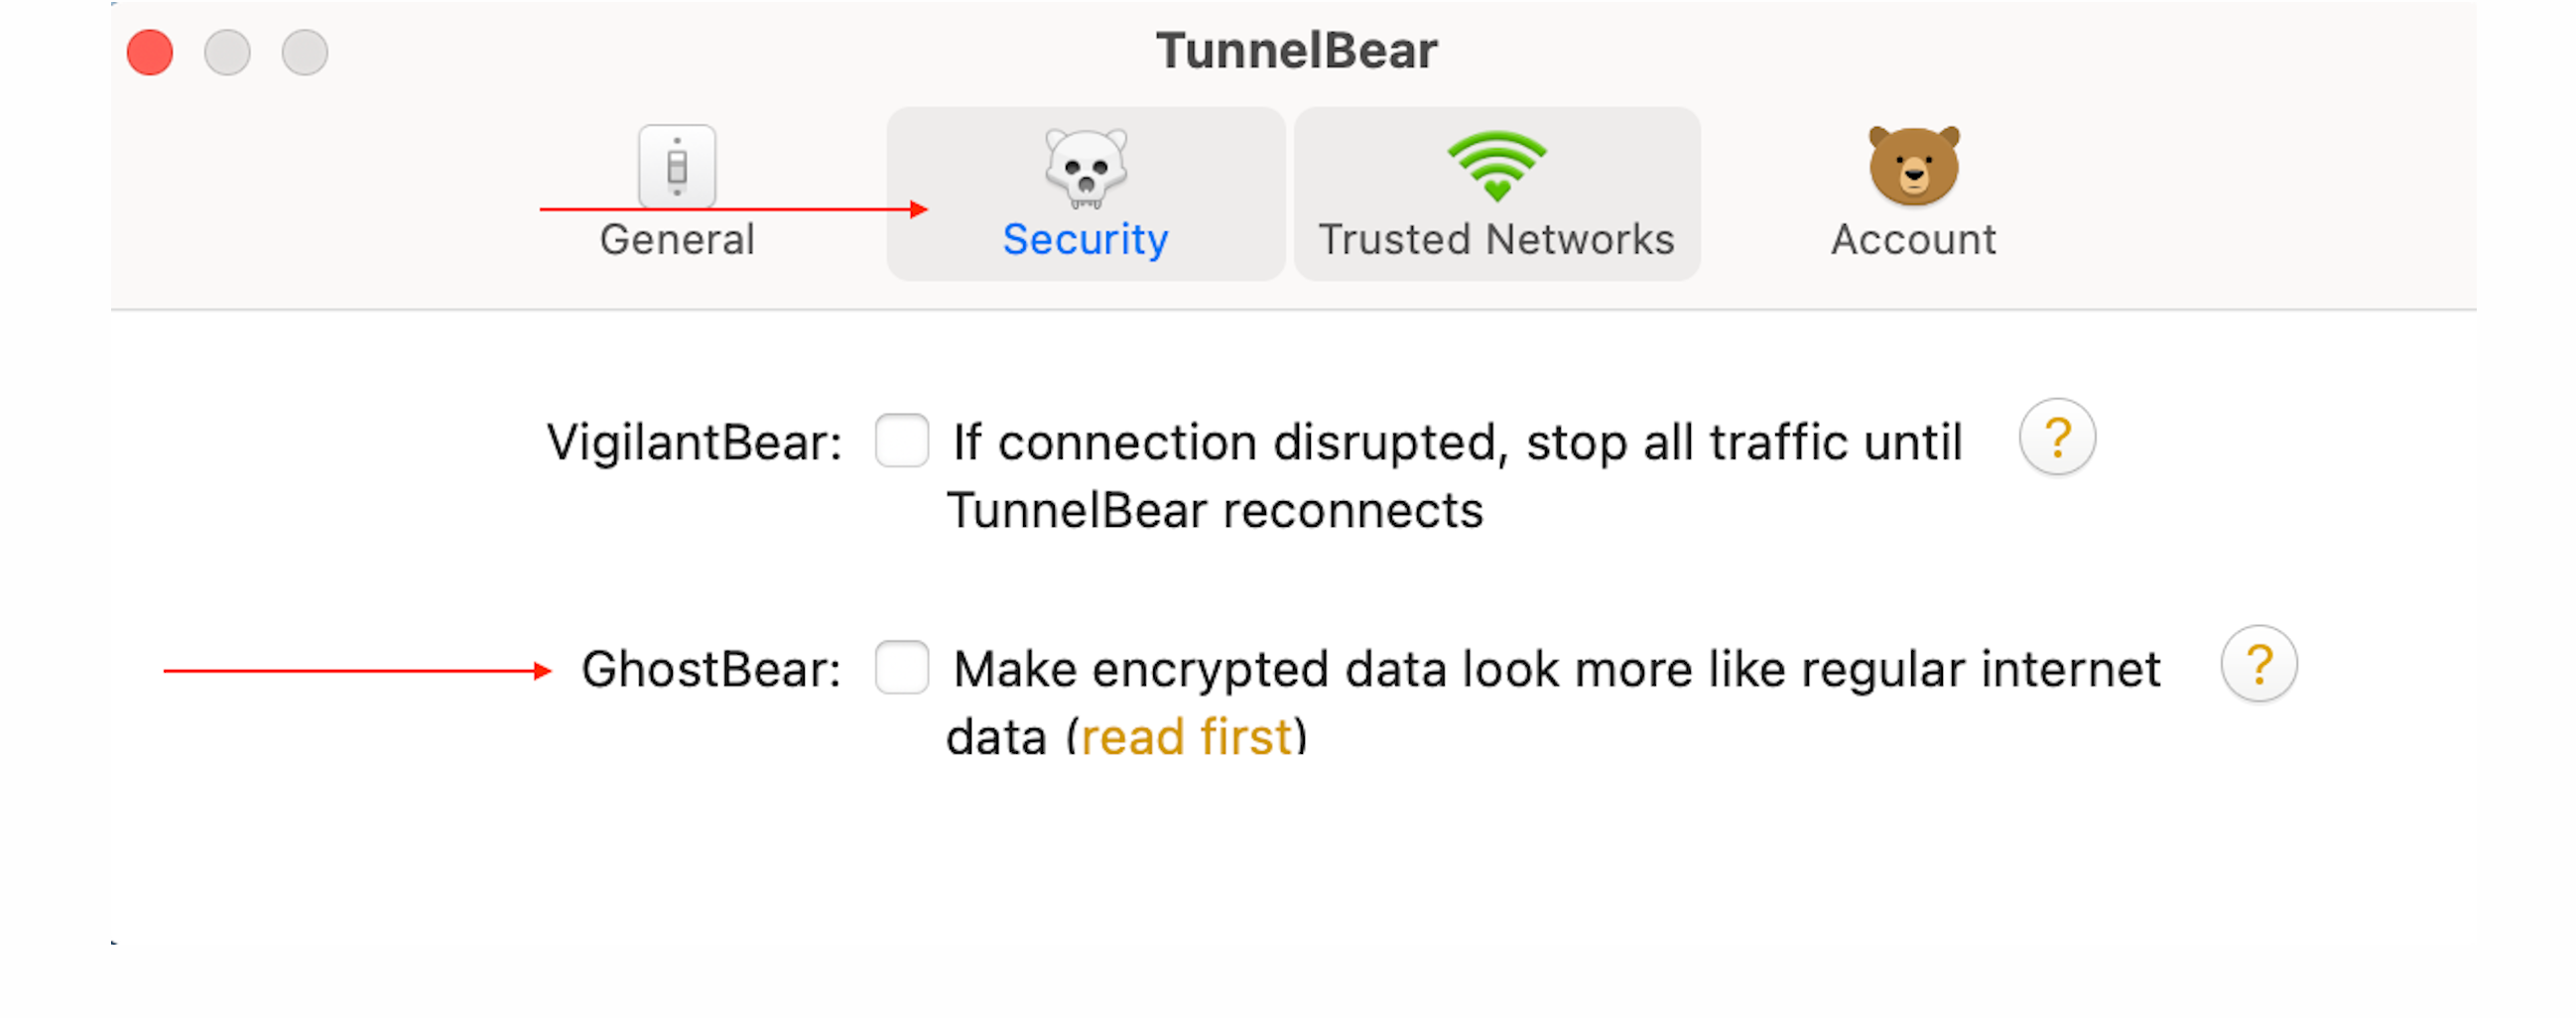
MacOS
Troubleshooting issues with GhostBearSlower connections:
Some speed loss is expected when GhostBear is enabled. This is caused by the extra ‘scrambling’ needed to further obscure your encrypted connection. If you don't need GhostBear to connect, turn it off for higher speeds.
GhostBear option greyed out:
1. If TunnelBear is already connected, you won't be able to enable GhostBear. Turn TunnelBear off and try again.
2. TunnelBear will not allow you to enable GhostBear if your computer is running a custom proxy. Sometimes third-party security programs, or alternate VPNs can be responsible for making these kinds of changes. Disable these and try connecting again.
NOTE: On some networks, a custom proxy is required to access the internet without TunnelBear, so please double check with your network administrator or ISP before disabling or changing any custom proxy settings if you’re not sure where they came from! For more information on how to check your current proxy settings on macOS, head here.
Issues with GhostBear on Windows:
Some Windows computers may be running a program that is known to interfere with GhostBear. If you have Killer Network Services installed, you'll need to disable it in order to use GhostBear. If you're unsure whether you have the program installed, simply open your Start menu and search for Killer Control Centre.
If you have the app installed, launch Killer Control Center and head into the Settings (gear icon on the left side). There, you'll see a toggle switch for Killer Prioritization Engine (formerly: Advanced Stream Detect). Make sure the toggle switch is in the OFF position. Then, try enabling GhostBear and connecting to TunnelBear again.
Visit/Rate Article -
SplitBear: Complete control over your network traffic
SplitBear gives you complete control over which apps and websites are tunnelled through TunnelBear's secure and encrypted connection.
Why should I use SplitBear?
If you are looking to use a specific app or website that you do not want to have protected by your Bear, SplitBear allows you to manage this without disconnecting from TunnelBear. Any apps that may restrict VPN access, you trust with your location/IP address, or anything that requires your local IP address to be detected, may be a service you wish to have TunnelBear bypass. All other traffic from your device will remain protected.
Windows SplitBear for Windows will allow you to exempt both websites and applications from your TunnelBear connection. macOS SplitBear for macOS allows you to exempt websites from your TunnelBear connection. You can also choose to Include Subdomains, which will help exclude associated URLs.
Note: Application split tunneling is currently unavailable for macOS.
iOS SplitBear for iOS allows you to exempt websites from your TunnelBear connection. You can also choose to Include Subdomains, which will help exclude associated URLs.
Note: Application split tunneling is currently unavailable for iOS.
Android SplitBear for Android will allow you to exempt select applications from your TunnelBear connection.
Note: Website split tunneling is currently unavailable for Android.
Please be aware: Applications and websites that SplitBear excludes from the tunnel will NOT be encrypted/protected by TunnelBear.
Visit/Rate Article


